


Preparation of the Ground for a Dome
The preparation of the ground for a dome is a key step for any successful construction, especially in a challenging environment like Patagonia. This article details how to carry out the necessary cleaning, leveling, and planning to ensure a stable and functional site.
Why Is Proper Ground Preparation Important?
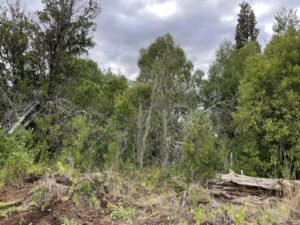
Choosing the exact location for the dome was a strategic decision combining practical factors with deep respect for the natural environment. We selected a spot with few trees, minimizing the need to disrupt the ecosystem, while ensuring nearby trees provided shade. Additionally, we considered the risk of wildfires, meaning some trees could be removed if necessary.
The dome was oriented toward the west, prioritizing sunlight during the afternoons, optimizing thermal comfort and natural illumination. Its placement also allowed for a unique view of a nearby quarry and a completely open horizon, integrating the structure with the landscape.
To ensure stability and prevent drainage problems, the dome was built on pilings, taking advantage of the gentle slope of a natural hill on the site. This approach also protects the structure under adverse weather conditions, such as heavy rain.
The project began in February, the height of summer in the southern hemisphere, an ideal time due to stable weather, which allowed for better working conditions. During this initial phase, we identified which trees and shrubs were alive, ensuring the surrounding flora was respected while planning an adequate perimeter area.
Step 1: Initial Ground Cleaning for the Dome
The work area was delimited to 8 meters by 8 meters, sufficient for a 6-meter-diameter dome. This initial planning laid the foundation for an efficient project in harmony with the environment.
The initial cleaning involved removing shrubs, branches, and stumps that could hinder construction. For this, tools like an Echo chainsaw, rake, and machete were used.
Step 2: Removing Stumps During Ground Preparation
The removal of stumps was one of the most labor-intensive steps in preparing the ground, as their presence could interfere with the leveling and stability of the dome’s base. This process required a combination of manual tools, light machinery, and careful planning to avoid unnecessary wear on equipment and optimize efforts.
The procedure began by cutting the tree with a chainsaw, leaving a well-defined stump. The area was then carefully raked to clear debris and provide clean access to the stump.
To work on the stump, a spade and a smaller shovel were used to unearth superficial roots and clear the base of the stump. This step was crucial to avoid dulling the chainsaw blade with stones or soil.
Depending on the stump’s size and condition, the largest roots were cut with a chainsaw, and then the most appropriate option for extraction was applied:
- Option A: Using a strap or strong tape. The strap was carefully passed under the stump, secured tightly, and pulled out with a truck. This technique was ideal for medium-sized stumps.
- Option B: Leveraging with a long and sturdy pole. This was effective for smaller stumps or when a vehicle wasn’t available.
In more complex cases, both techniques were combined to ensure complete removal of the stump, leaving the area obstacle-free and ready for leveling.
Ground cleared and delimited with colihue canes and strings, marking the initial area shape where layout and leveling with a hose will be carried out. This step allowed for a quick visualization of project boundaries.
Step 3: Marking Levels and Site Layout for the Dome
In this project, the terrain was not completely leveled since the construction was carried out on pilings on a natural hill. This strategic decision allowed for the advantages of natural drainage while reducing environmental impact by avoiding significant earth movement. However, it was crucial to establish precise levels and references to ensure the pilings were perfectly aligned and stable.
Using a Transparent Hose for Level Marking
The transparent hose with water was a key tool at this stage. This reliable and straightforward method allowed for precise level marking at each point where the pilings would be installed. The technique involved:
- Placing one end of the hose at the initial reference point.
- Checking the water level alignment at both ends of the hose to match the desired level at each point.
- Repeating the process across other points on the hill to ensure uniformity in the height of the pilings.