
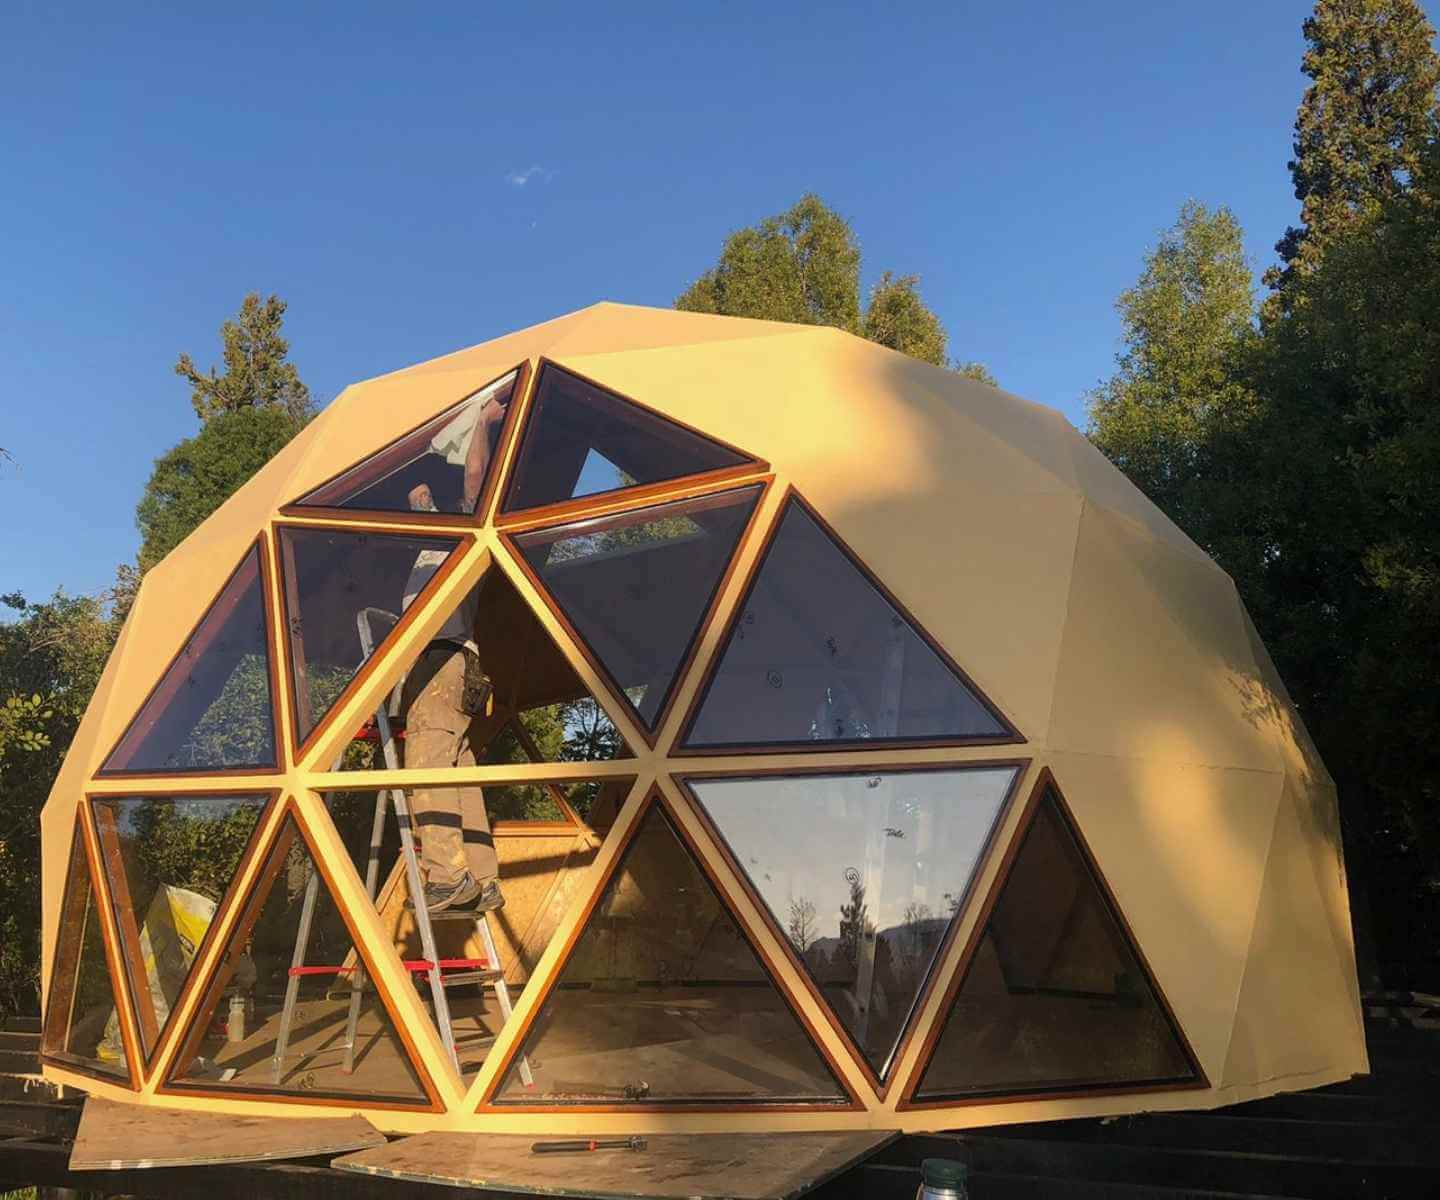
This article details the process, mistakes, and lessons learned while building triangular openings for a geodesic dome, based on real experience in Patagonia. We share both the solutions that worked and the costly failures so you can make better decisions for your project.
The Geometric Challenge: Hand Calculation vs. Digital
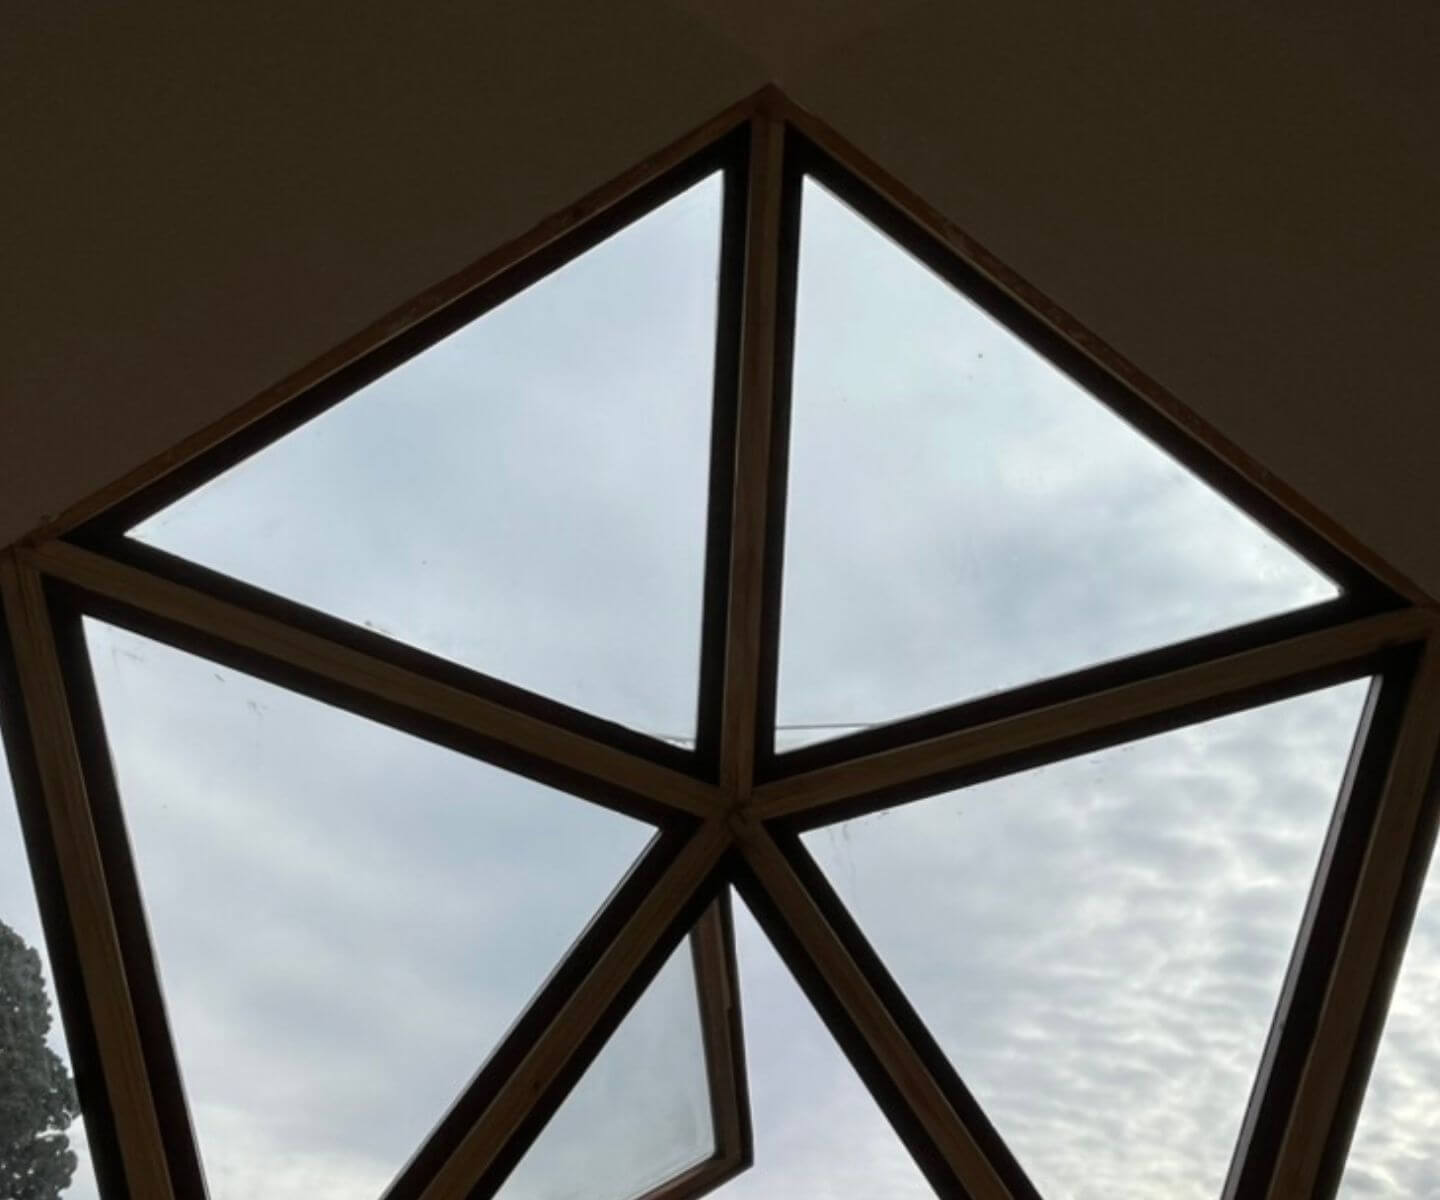
Fundamental problem: In a geodesic dome, the real challenge isn’t that the triangles are different, but manufacturing window frames that correctly adapt to the specific triangles chosen for the openings. Although the dome geometry may seem repetitive, each opening introduces particular angles, joints, and supports that must be resolved case by case.
The solution involved combining direct measurement on the structure with precise drawing in Adobe Illustrator, allowing real measurements to be transferred to a clear plan before cutting wood. Using a digital tool doesn’t replace calculation, but helps visualize joints, extensions, and tolerances.
In all cases, starting measurements must come from the specific dome calculation (previously defined in Acidome) and always verified against the actual mounted triangle. What matters isn’t the tool used, but respecting the specific geometry of that dome and not relying on generic or theoretical measurements.
Method Used
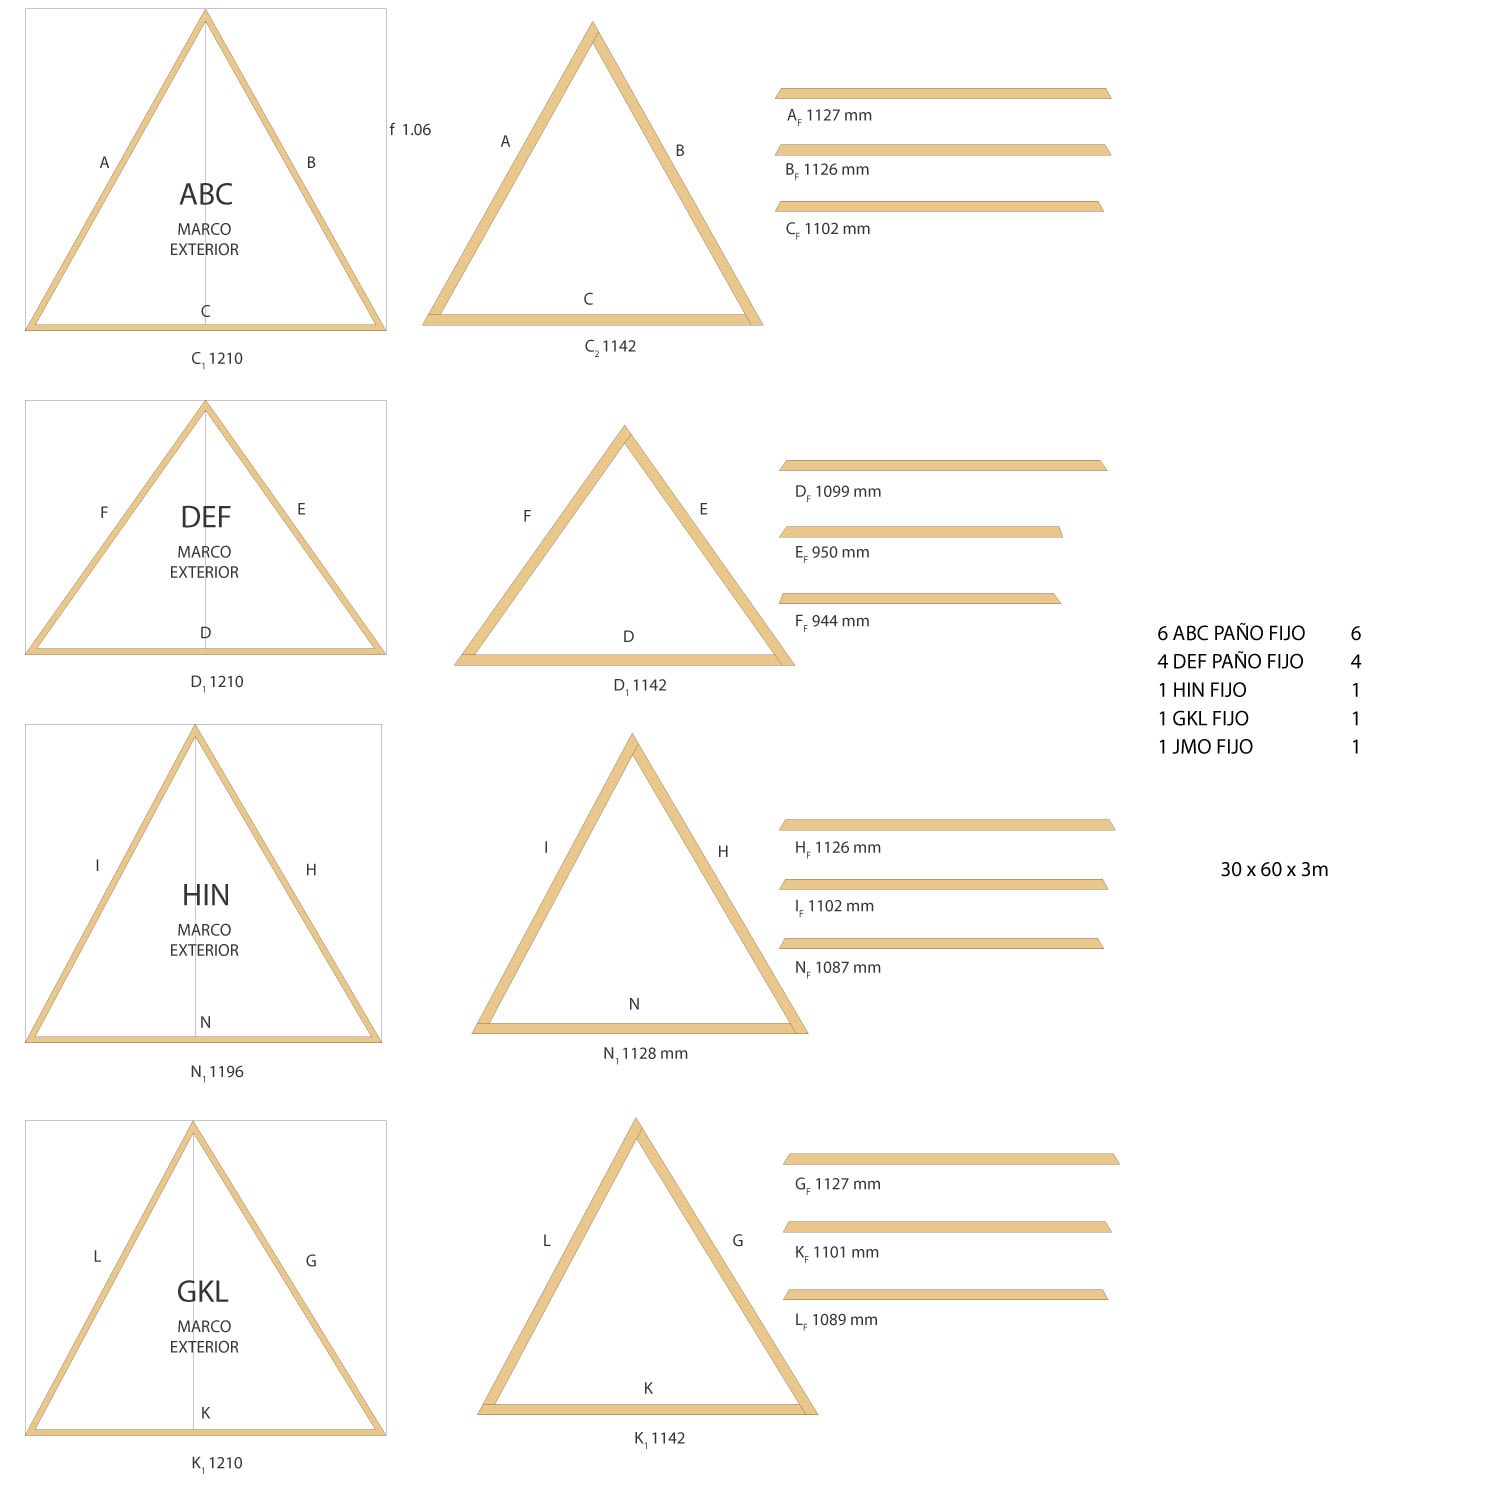
- Work from the actual structural triangle: Once the dome structure is assembled, define which triangle will house the window and take corresponding measurements. Work not with theoretical or repeated triangles, but with what actually exists on site + Acidome.
- Respect exact vertex angles (Example: A, B, C) obtained from Acidome.
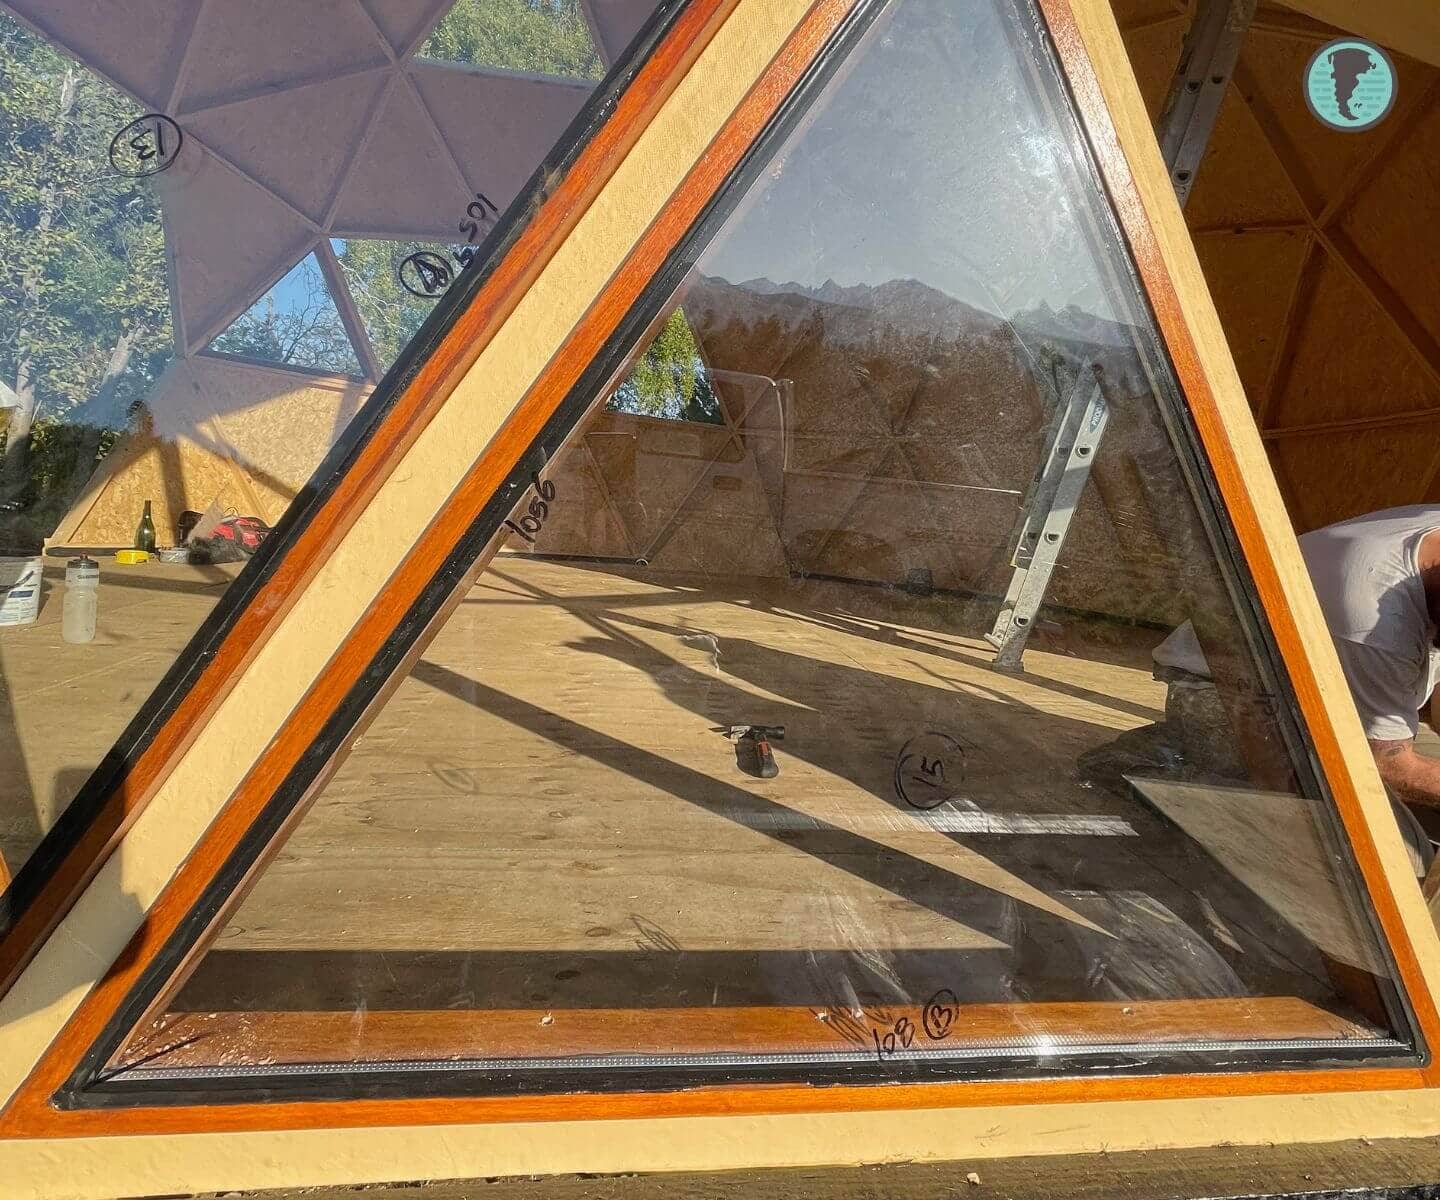
- Verify interior and exterior lengths: The structural triangle edge alone doesn’t define the piece length. With the structure tilted toward the dome interior, the exterior and interior sides of the frame have different lengths. These differences must be transferred, checked on the plan, and verified before cutting the wood frame for openings.
Digital-Assisted Solution (Illustrator + Manual Calculation)
Plans and schematics were created in Adobe Illustrator, combining actual structural triangle measurement with precise vector drawing.
The workflow was as follows:
- Direct measurement of the assembled dome triangle, respecting actual angles and lengths.
- Transfer of those measurements to Illustrator to draw each side, vertex, and necessary extension.
- Visual control of joints and overlaps (edge sum + “tip” of adjacent piece) before cutting wood.
- Print or direct reference of the drawing as cutting plan and verification.
This methodology doesn’t eliminate hand calculation, but reduces accumulated errors, allows corrections before cutting, and leaves a clear record of each opening. For construction, mastering a simple Illustrator workflow can save costly rework and entire days of on-site adjustments.
Material Selection: Wood, Glass, and Sealants
The golden rule: Materials for openings must be of higher quality than those of the main structure.
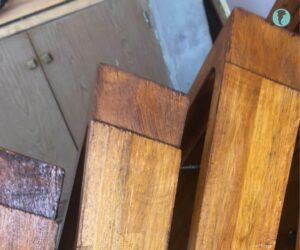
1. Wood for Frames
- Species: Eucalyptus is recommended over pine. Its density and natural durability are ideal.
- Condition: Dry wood and as straight as possible. Green wood will warp, break the glass, and ruin the seal.
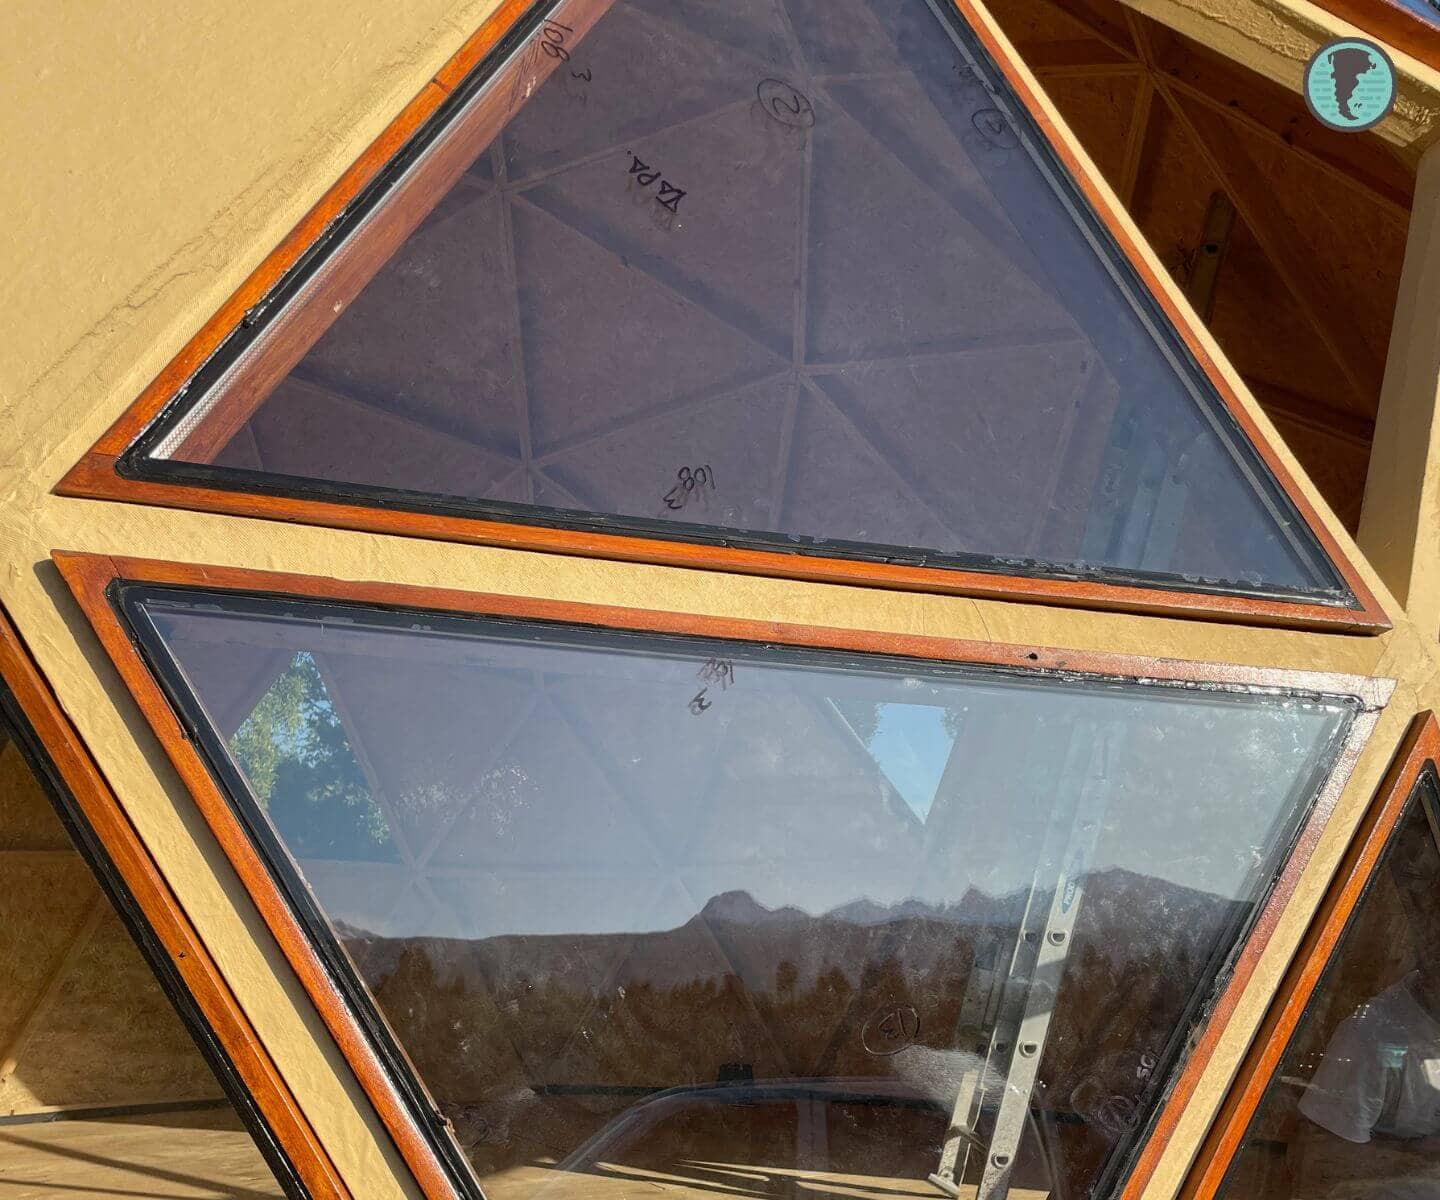
2. Glass – The Most Critical Choice
- Laminated glass (3+3 or 4+4): Recommended for safety, since the dome is concave and, in case of breakage, regular glass would fall directly inward.
- IGU (Insulated Glass Unit): Theoretically ideal for thermal and acoustic insulation. In practice, in large triangular openings it presents serious limitations, as it’s not a standardized format and the seals work under uneven stress.
3. Sealants and Adhesives
- For glass and initial mounting: Black polyurethane sealant for windshield installation was used. It’s a product with very high adhesion and resistance, but extremely thick and difficult to work with in triangular geometries and multiple joints.
- For frame attachment to dome: The same polyurethane sealant was applied along with mechanical fastening using screws, seeking maximum watertightness.
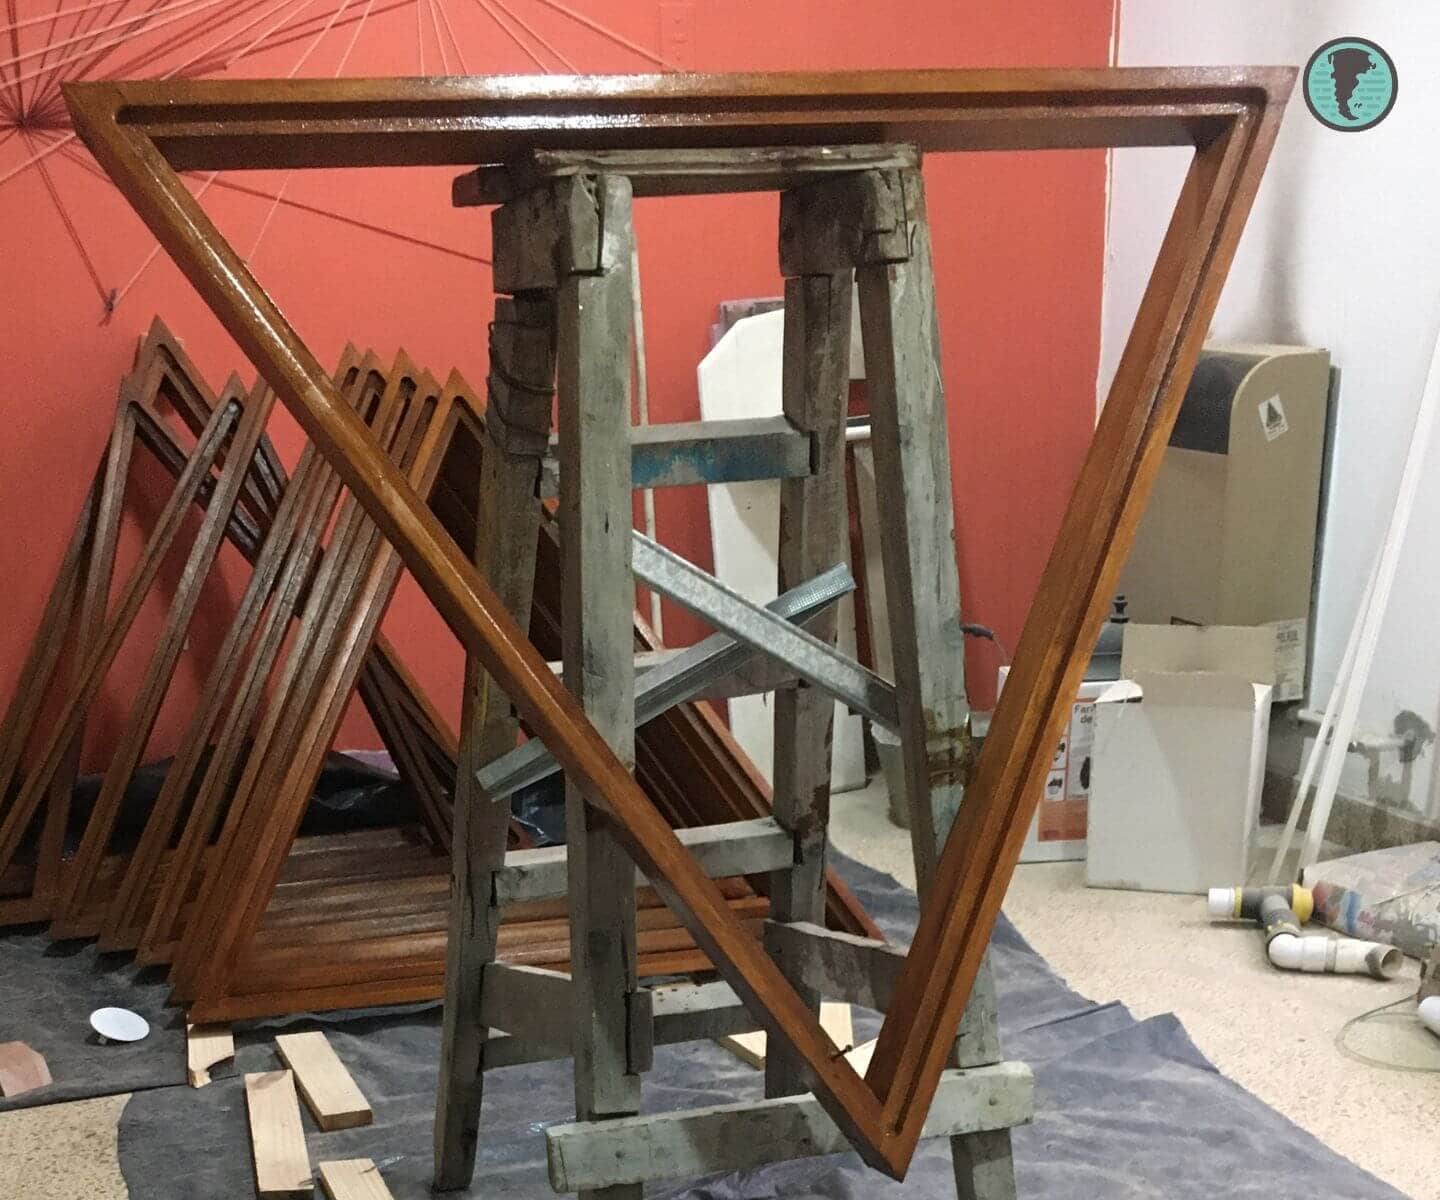
Frame Fabrication
Important clarification: Two types of windows were used in the dome: fixed panels (non-opening glass) and opening windows.
Step-by-Step Process – Fixed Panel
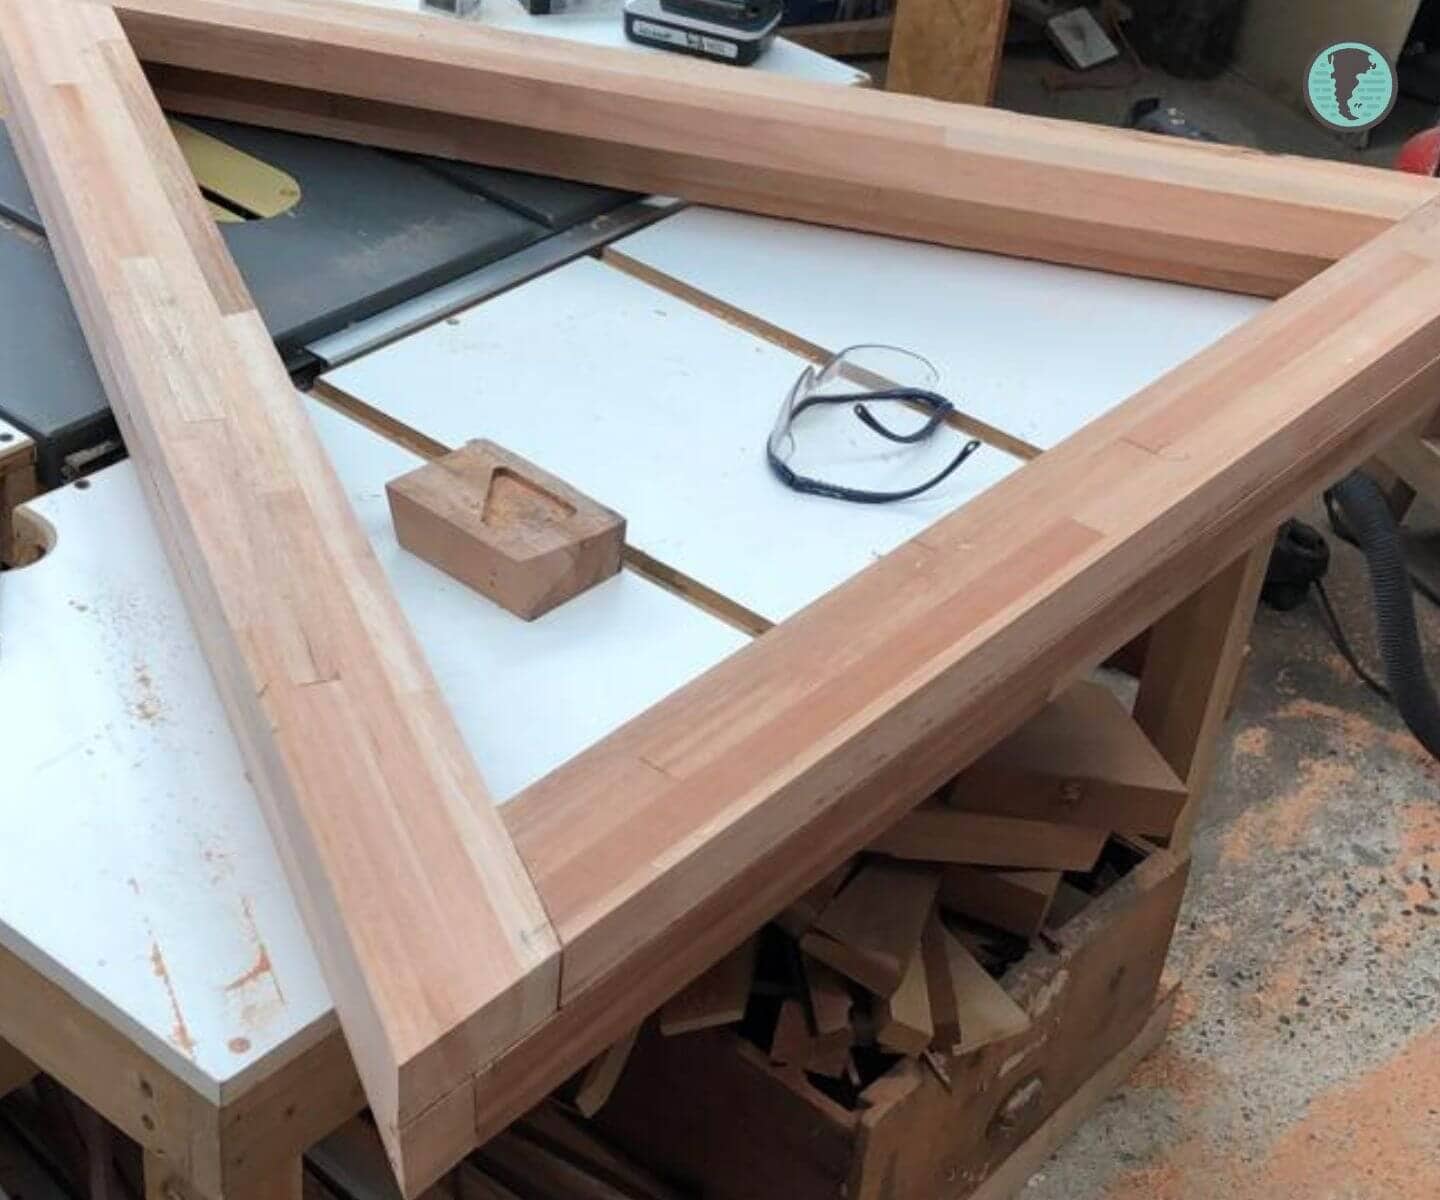
- Cutting the pieces: All frame parts were cut on a table saw, respecting the specific angles of each triangle side.
- Assembly of fixed frame: The complete frame was assembled from cut pieces, checking squareness and joints. Here, the frame functions solely as glass support, with no moving parts.
- Creating interior rabbet: Using a router, a continuous perimeter rabbet was made, leaving an interior cavity approximately 20–25 mm (depending on glass thickness). This rabbet is key for proper glass installation.
- Glass installation: Glazing was done in the workshop, placing each glass in its corresponding frame and sealing with polyurethane sealant, ensuring continuous support and airtight closure.
Sash Construction and Professional Glazing
Step-by-Step Process – Opening Windows
- Cutting frame pieces: Exterior frame parts were cut on a table saw, respecting the actual angles of the triangle defined in the dome structure.
- Assembly of exterior frame: The fixed frame to be anchored to the dome was assembled, checking squareness and joints.
- Creating channels and rabbets: Using a router, the perimeter rabbet was made, creating an outward protruding ridge (approx. 20–25 mm), crucial for water runoff.
- Fabrication of movable sash: A second triangular piece of smaller section was built, functioning as the window sash and housing the glass.
- Glass support channel: Both in the frame and sash, a flat, continuous support surface was machined to ensure proper glass sealing.
- Dry fitting: Before glazing, the complete assembly (frame + sash) was dry-fitted, checking clearances, fits, and proper opening operation.
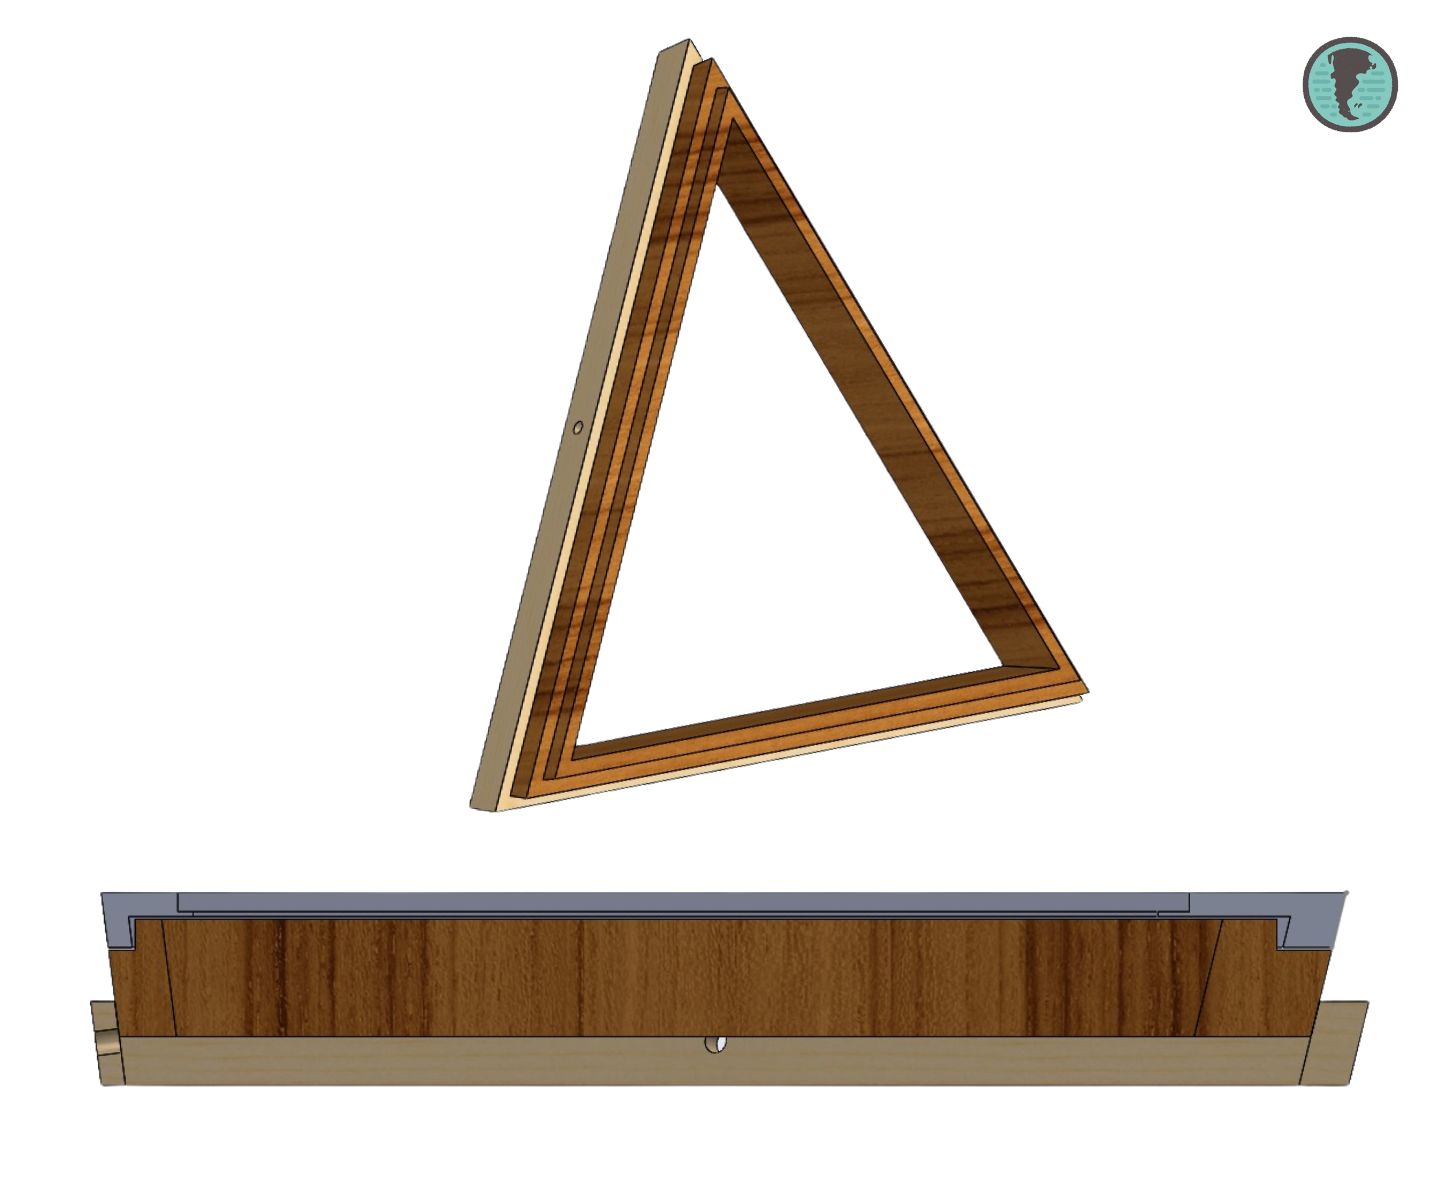
Fundamental concept: In openings, the frame must protrude outward from the dome’s curved line. If flush or recessed, it creates a “pool” where water accumulates, increasing leakage risk.
Frame Treatment and Finish
Once machining was complete, all frames were sanded (wood can also be sanded before assembly) and protected with Cetol Walnut for windows, applied in multiple coats per manufacturer specifications. This finish was chosen for its good weather resistance and ability to accommodate wood’s natural movement without cracking.
Beyond the product used, the key is not leaving wood exposed: edges, rabbets, and hidden areas should receive the same treatment as visible faces.

Crucial Glazing Lesson
As mentioned earlier, this step was done in the workshop, on a table and before installing the opening in the dome. Glazing under these conditions allows working with greater control, ensuring proper support, and avoiding unnecessary stress on the glass.
- Place the triangular wood frame on a completely flat surface.
- Apply a continuous bed of sealant throughout the rabbet intended for the glass.
- Set the glass with uniform pressure, ensuring it contacts its entire perimeter and avoiding air bubbles.
- Don’t skimp on sealant: Excess that squeezes out cleans up and acts as a first barrier against water ingress.
- Let sealant cure between 24 and 48 hours before handling or installing the opening.
Window Hardware: Hinges and Support Systems
In a triangular dome opening, hardware isn’t a minor detail. Glass weight, irregular shape, inclination, and wind exposure mean hinges and securing systems work under more stress than in conventional windows.
Hinges
- Mortising required: The frame was mortised with a chisel until the hinge was flush with the wood, avoiding steps, water accumulation, and closing problems.
- Quantity: For large openings or heavy glass, using 3 butt hinges on the sash opening side is recommended. For smaller windows, a minimum of 2.
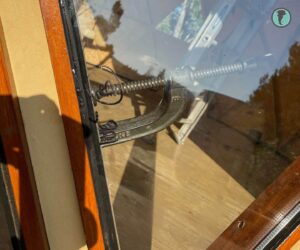
Opening Pistons or Arms
- Function: Prevent the sash from falling under its own weight and allow opening control.
- Options: Gas springs or projecting arms, depending on availability and design.
- Quantity: In windy areas or with heavy sashes, using two pistons per opening is highly recommended. A single attachment point is usually insufficient.
- Important note: In triangular openings, the entire system operates outside rectangular window standards. Over-sizing hardware isn’t a luxury: it’s a safety and durability measure.
On-site learning: We chose a projecting arm with fixed positions via holes, seeking stiffness against winds and the ability to leave the opening at different angles. In practice, this was a poor decision: with use the system began to loosen, lost adjustment, and ended up being uncomfortable to operate. The combination of weight, wind, and triangular geometry demands more stable, self-supporting securing systems.
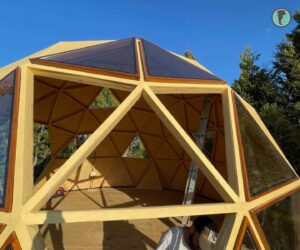
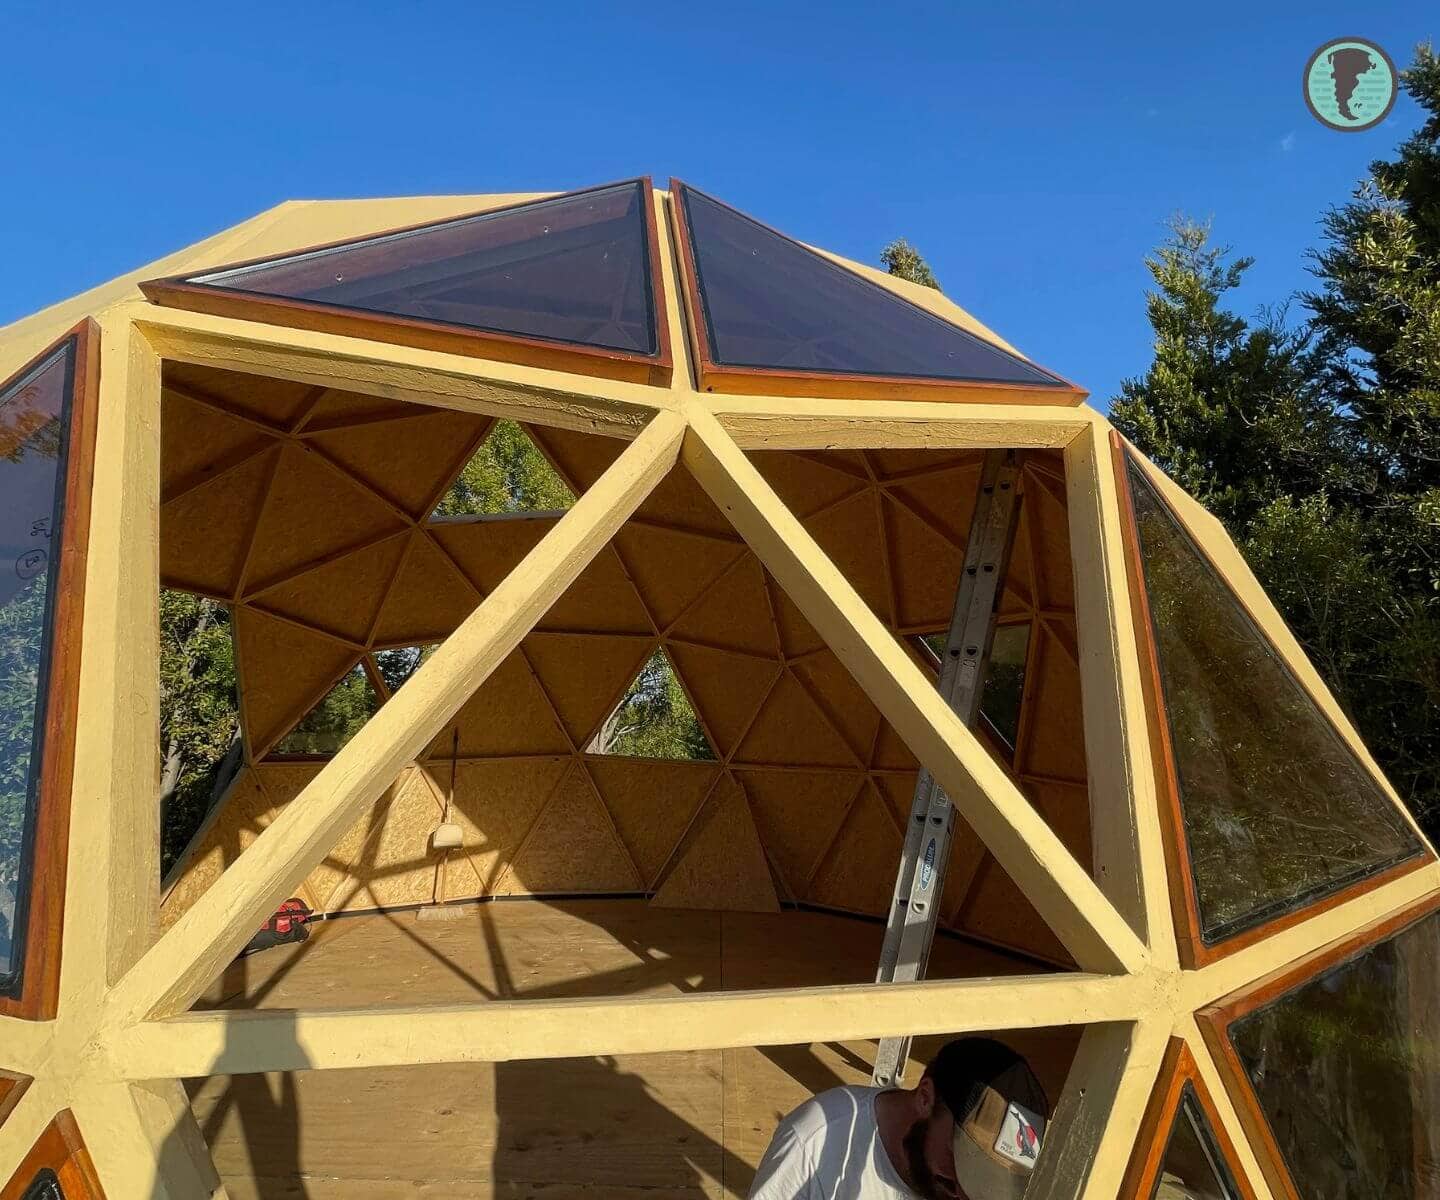
Final Dome Installation
This stage was done once the windows were completely finished: frames glazed in the workshop, sealant cured, and pieces ready to mount. Installation was done directly on the dome, taking advantage of good weather.
- Dry fitting: Each window was placed in its final position to verify fit, support, and alignment with the dome opening before applying sealant.
- Sealant application: Polyurethane sealant was applied to the contact perimeter between frame and dome structure, seeking a continuous bead.
- Window placement: With fresh sealant, the window was positioned in the opening and adjusted to its final position.
- Mechanical fastening: The window was secured with screws from the interior, working together with the sealant as a combined fastening and waterproofing system.
- Final inspection: Perimeter sealing was visually checked and excess or insufficient material corrected on the spot.
Important note: Work was done without rain, at suitable temperatures, and with sufficient time for the sealant to cure properly.


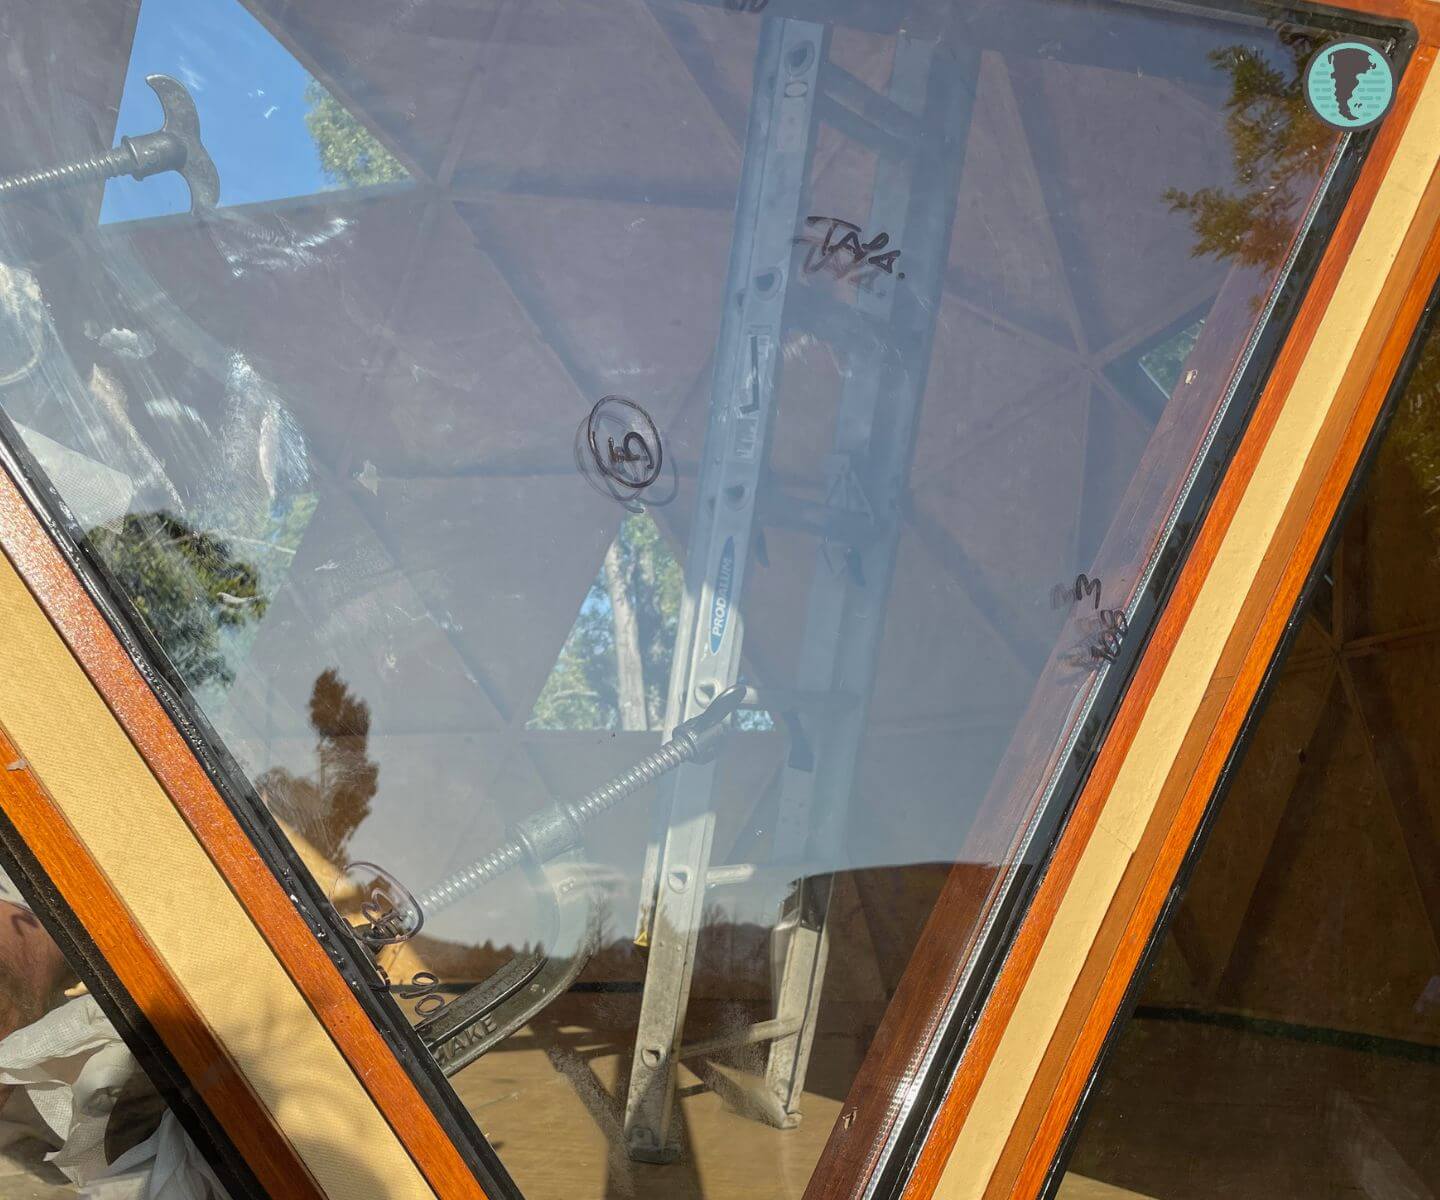
Real Case: The Main IG Window Wall Failure and Replacement
Problems That Arose
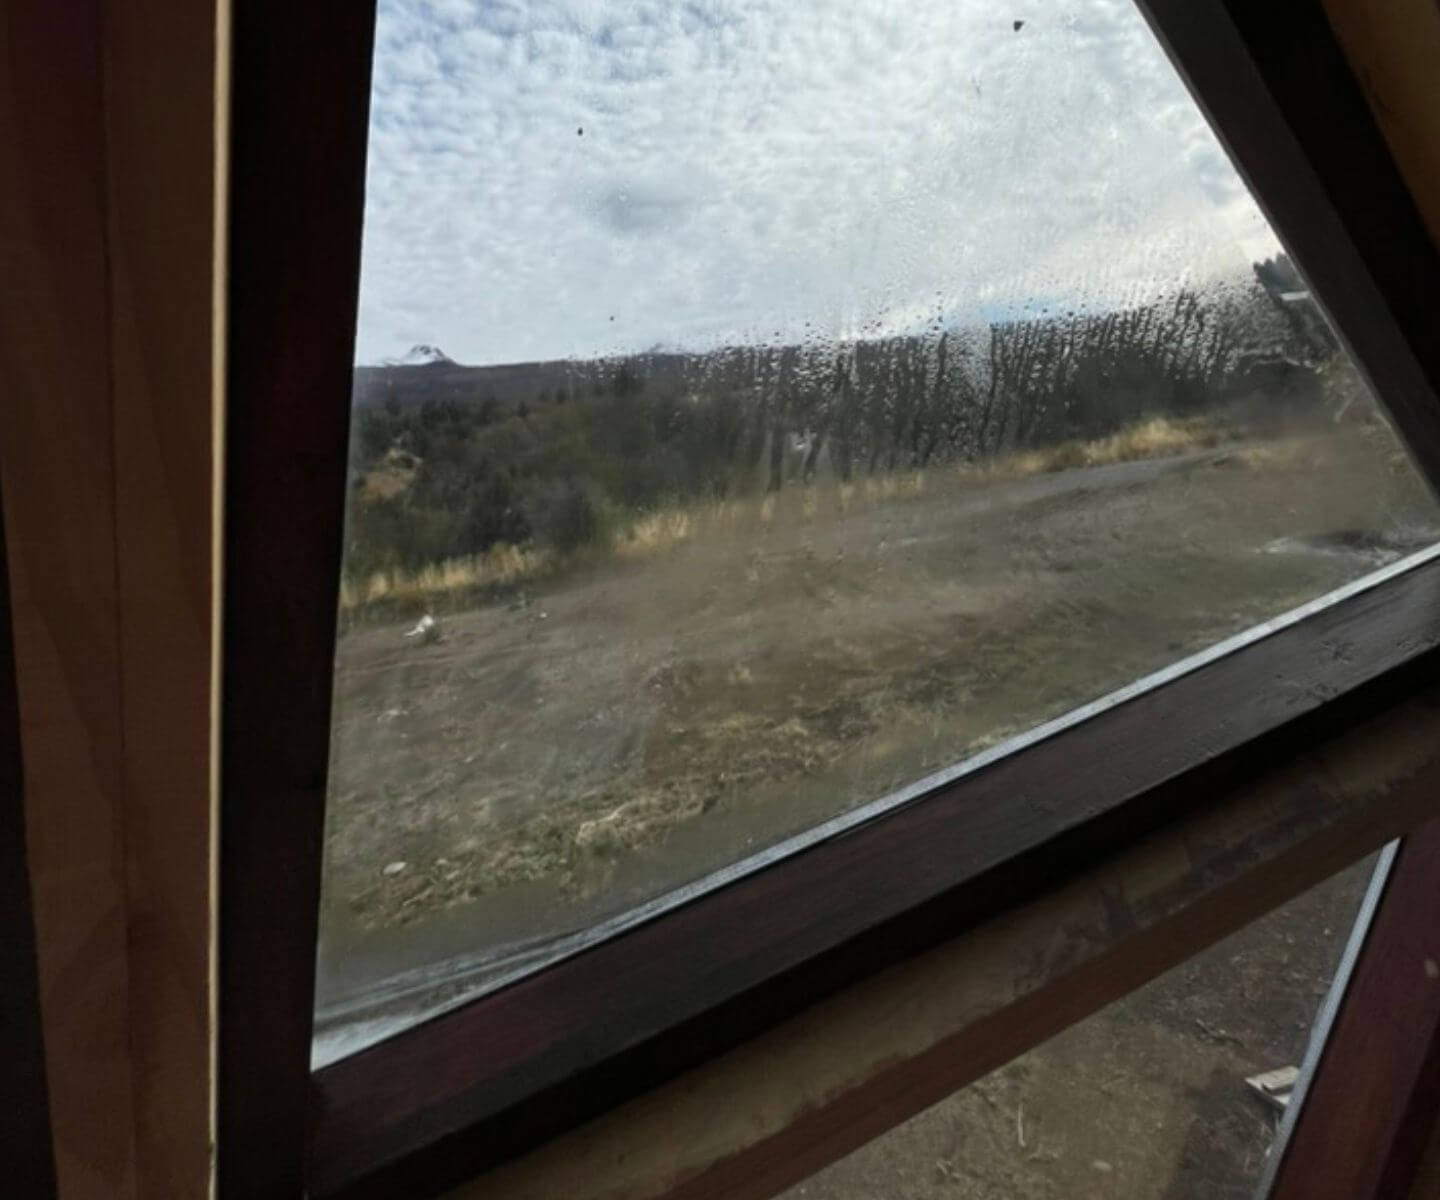
- Persistent leaks in lower corners after heavy rains
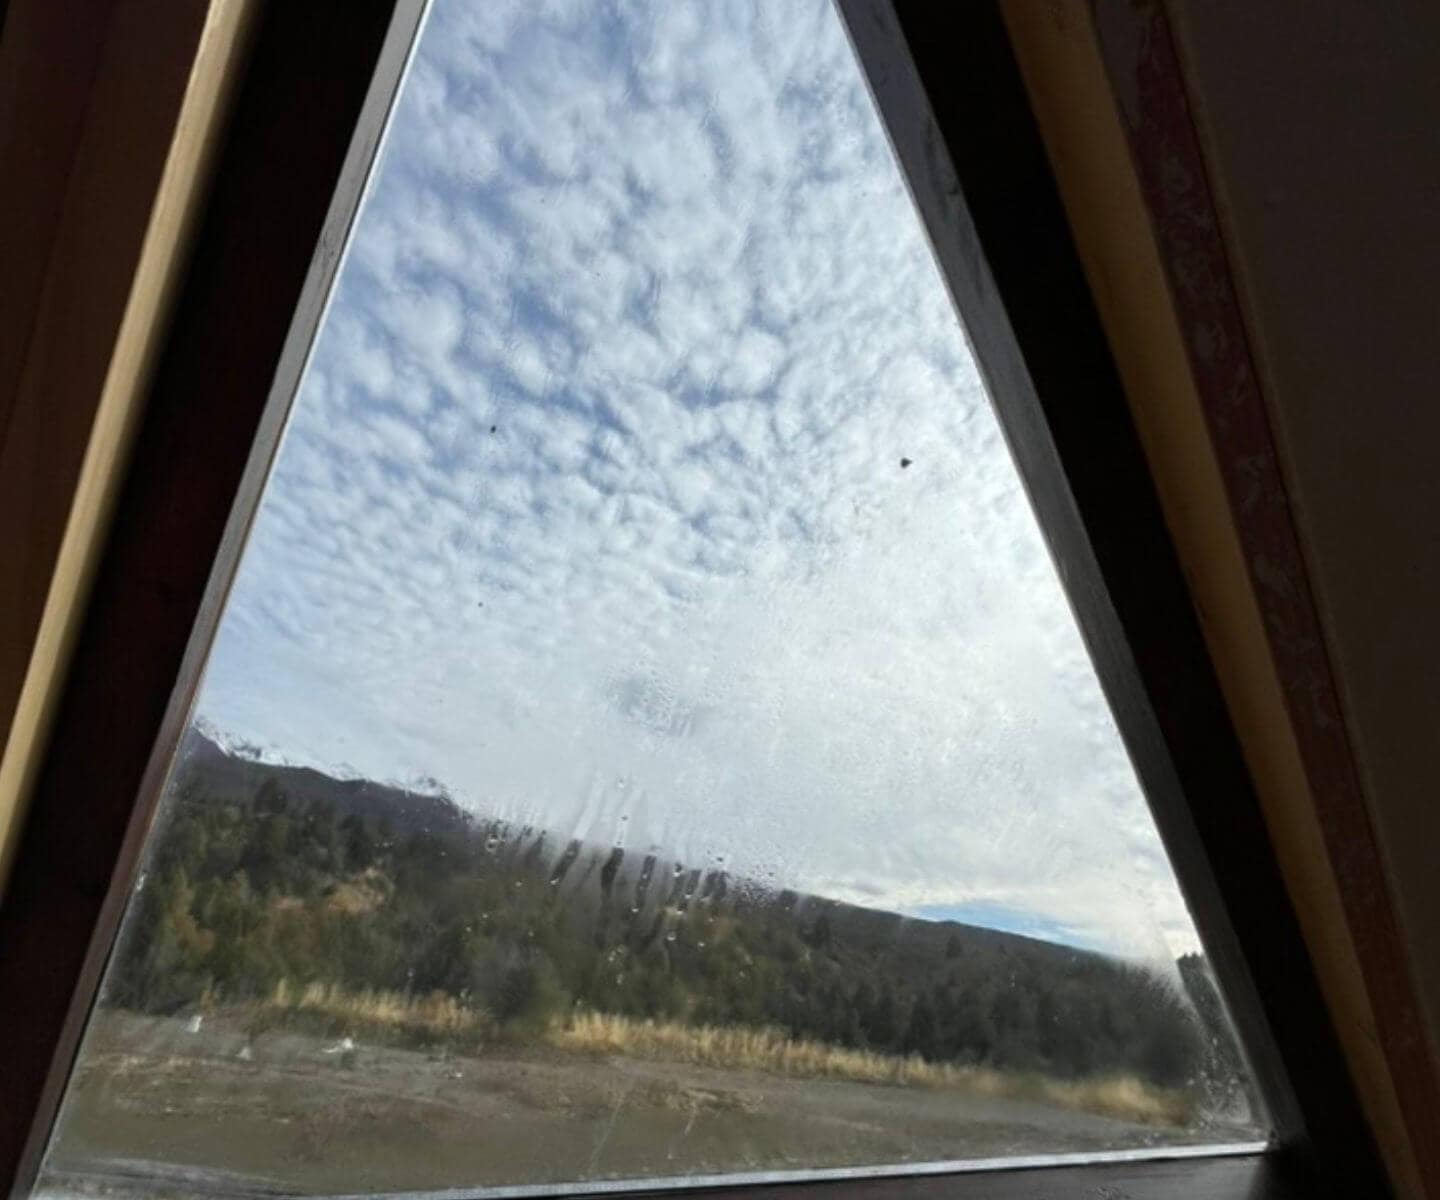
- Internal condensation between IGU glass panes (seal failure)
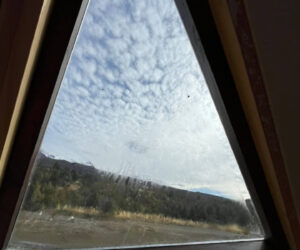

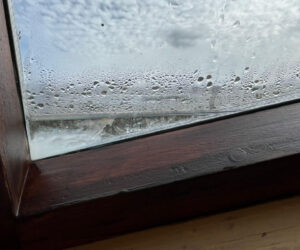
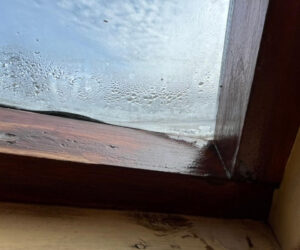
Warning based on real experience: All IGUs installed in triangular openings ended up failing. Seals “popped,” water entered, and internal condensation appeared, especially in the window wall most exposed to sun and weather. In triangular geometry, unlike rectangular windows, the glass doesn’t work uniformly and IGUs don’t tolerate those stresses well. Add to this that the polyurethane windshield sealant didn’t fail due to poor quality, but because of usage conditions: its high viscosity makes neat application with a caulking gun difficult in acute corners and irregular surfaces like a dome’s. Even applied carefully, the material tends to be uneven, creates over-thicknesses, and doesn’t always achieve uniform contact across the entire surface.
The Definitive Solution Applied
After multiple repair attempts and living with the failures for some time, the decision was made to change approach.
- Completely remove the window wall with all fixed IGU panels and center opening.
- Install a conventional rectangular window of high performance, with a more standardized sealing and drainage system.
Note: This intervention was done well after original construction. The design, execution, and performance of the new window wall will be covered in a specific article detailing the complete process and technical reasons behind the change.
Lessons Learned
- IGUs in large triangular openings are too sensitive to a dome’s structural movements
- The cost-benefit of maintaining complex triangular openings vs. simple rectangular ones must be carefully evaluated
- Glass manufacturer warranties typically don’t cover installations in non-conventional geometries. In this case, the failure wasn’t covered by warranty and meant a $1,500 USD loss.
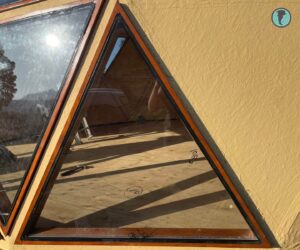
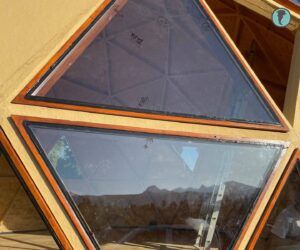
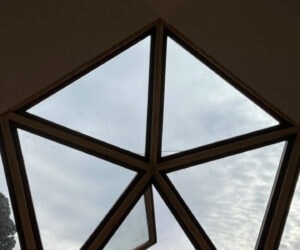
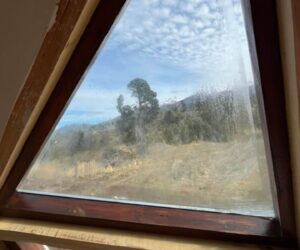
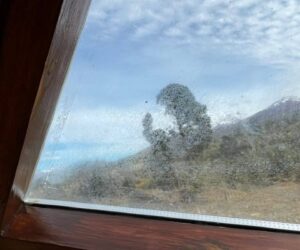
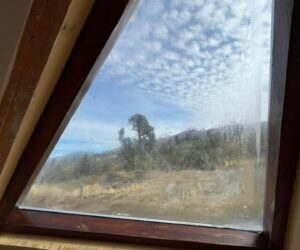
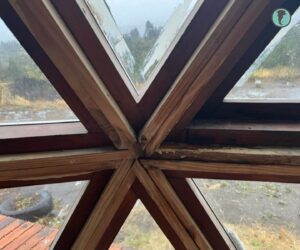
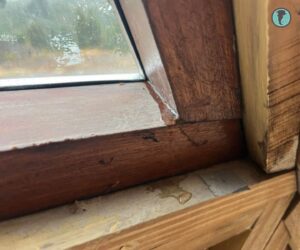
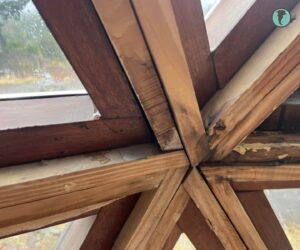
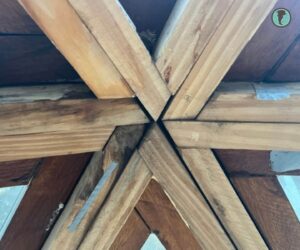
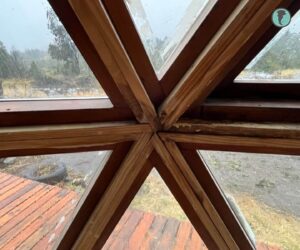
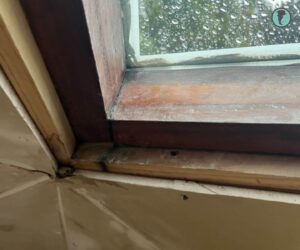
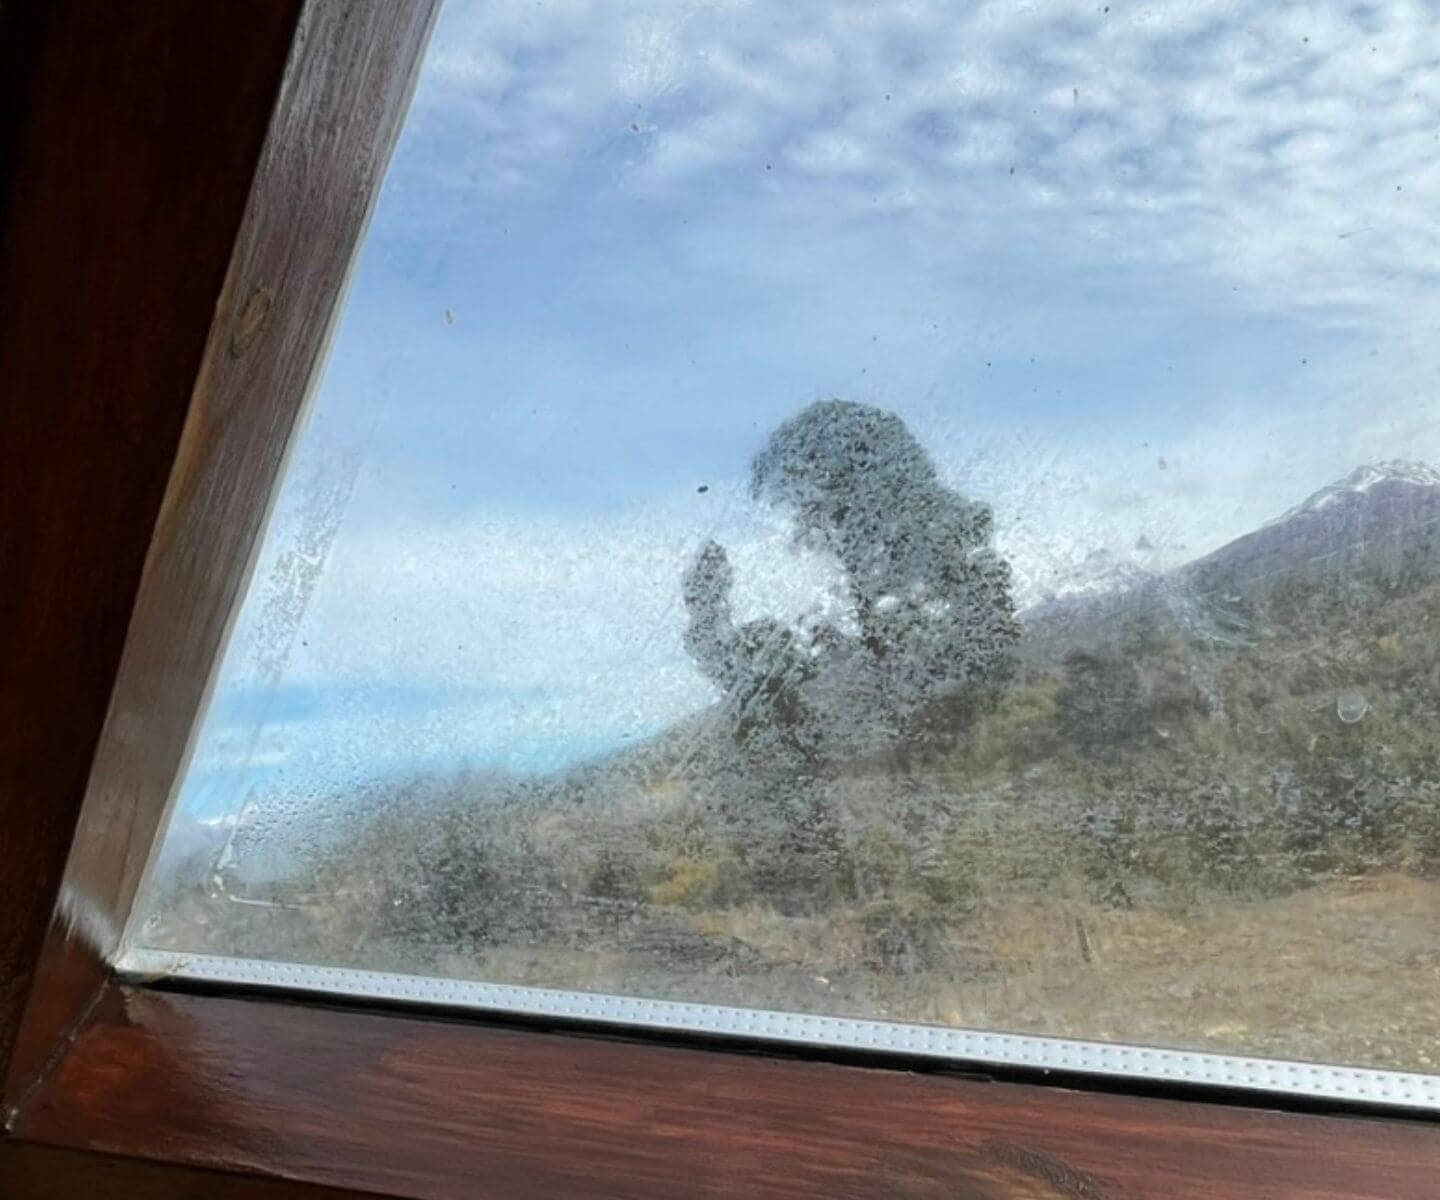
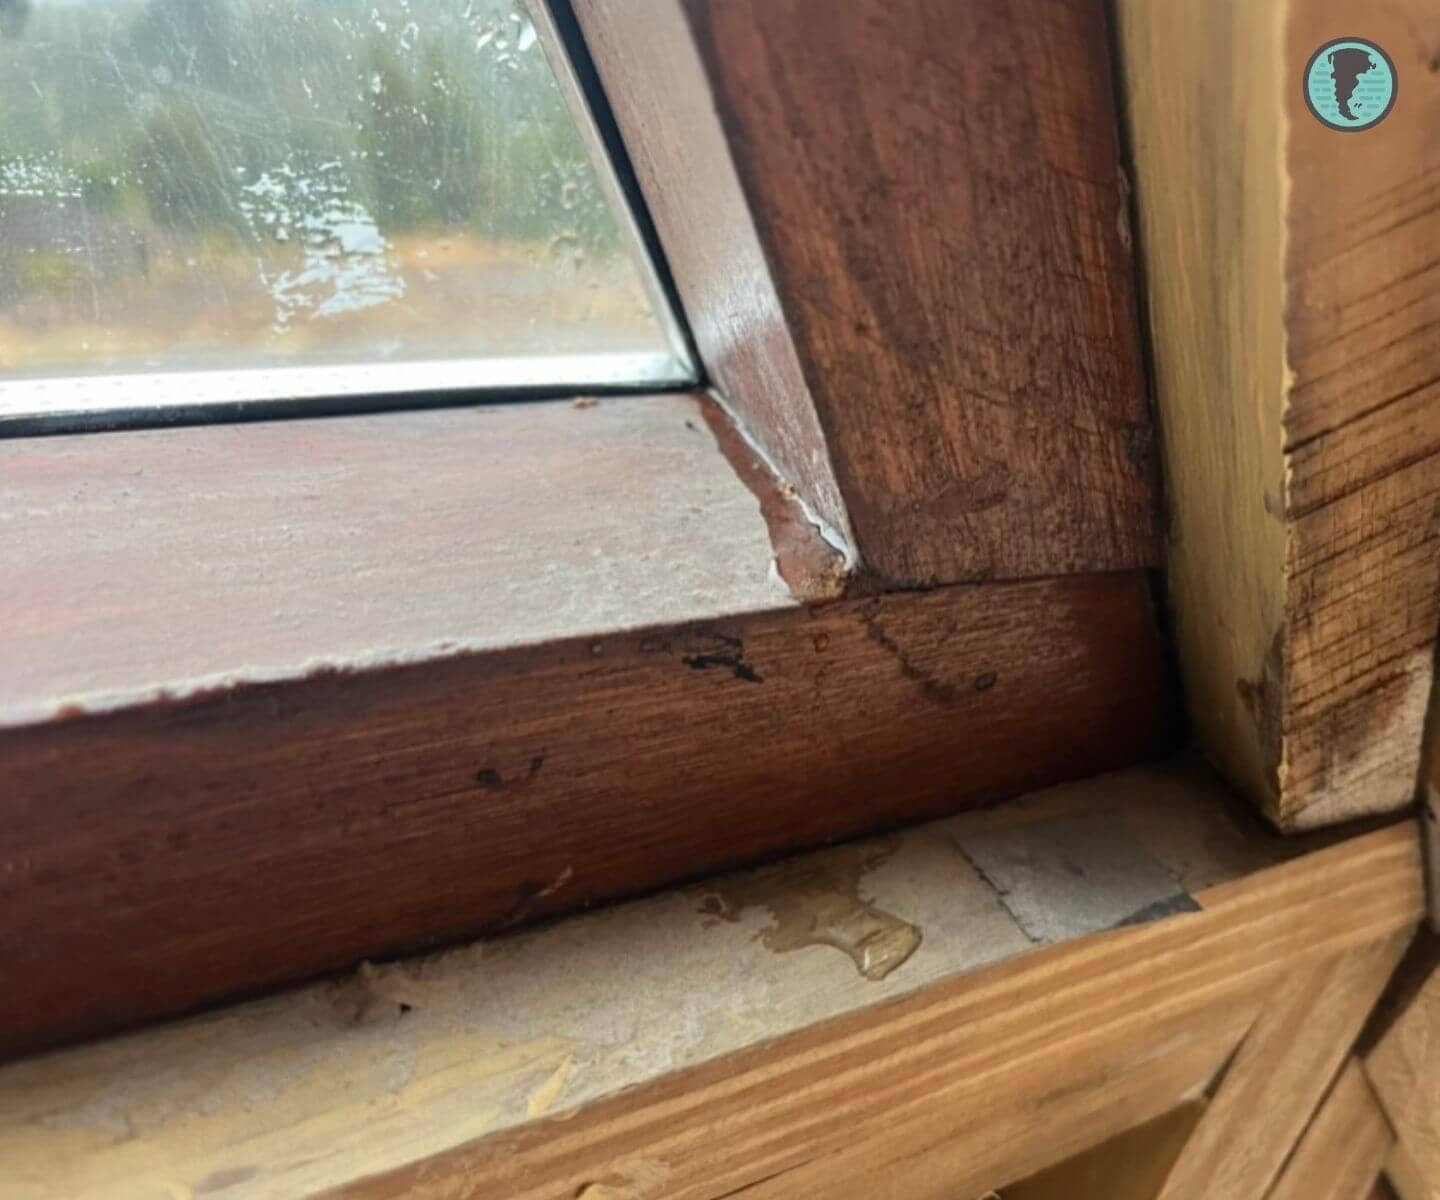
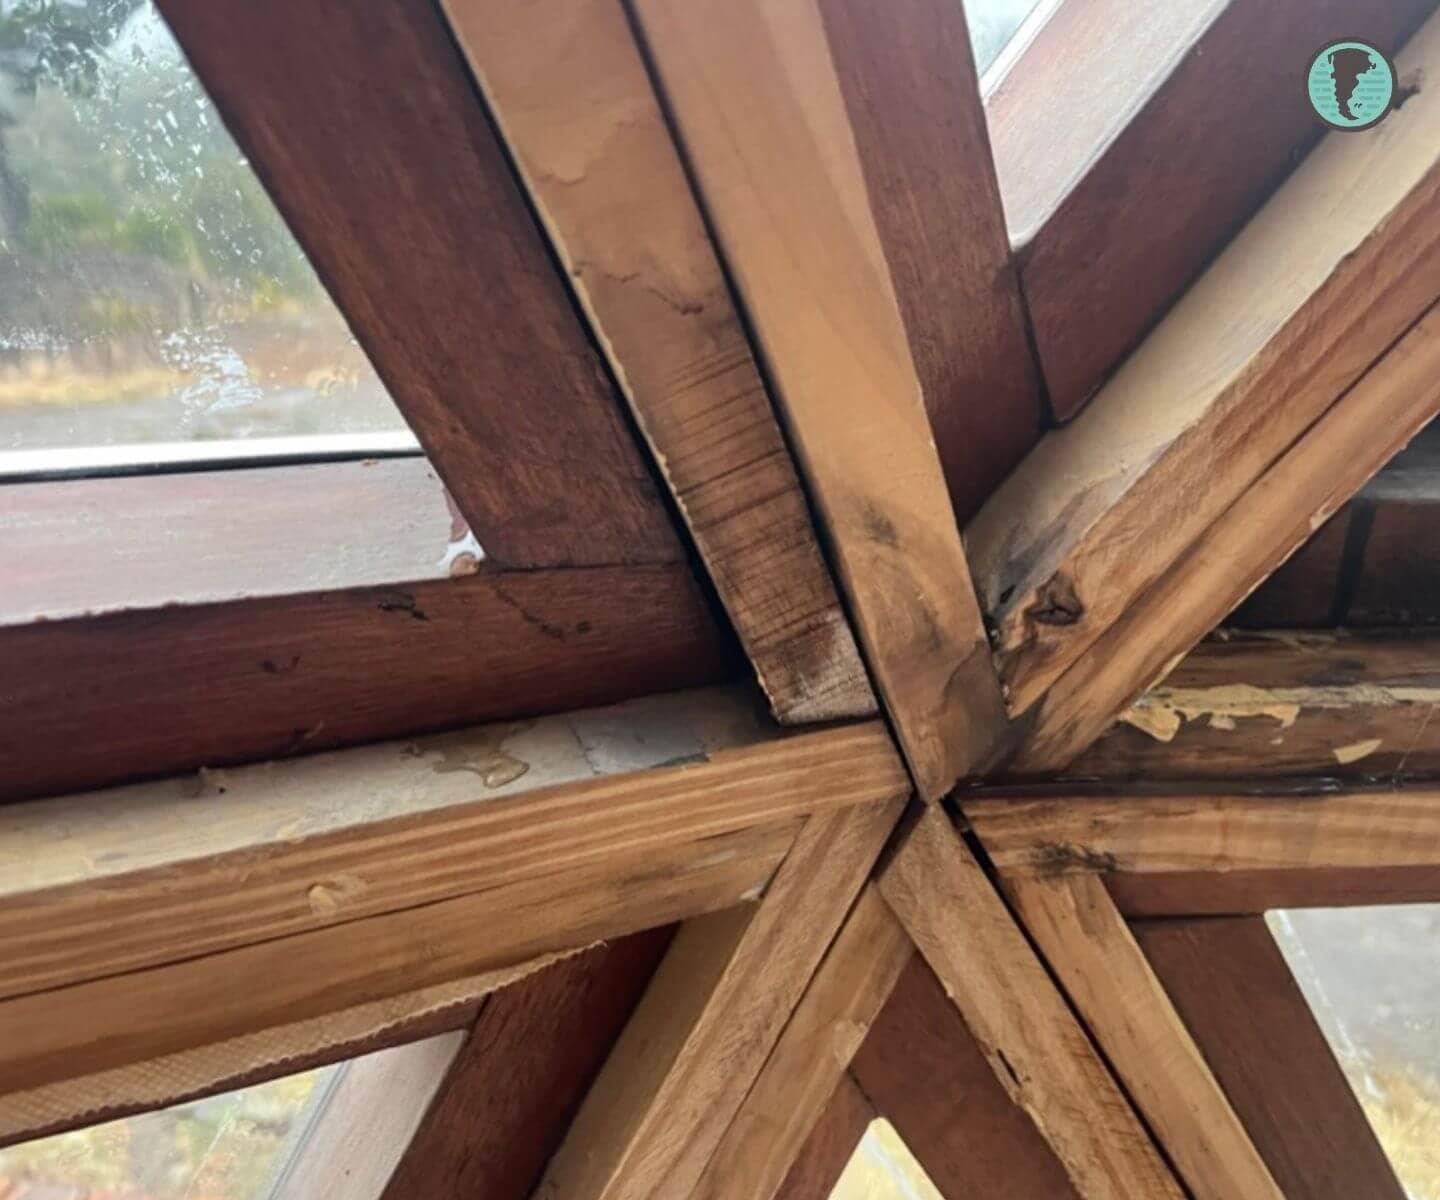
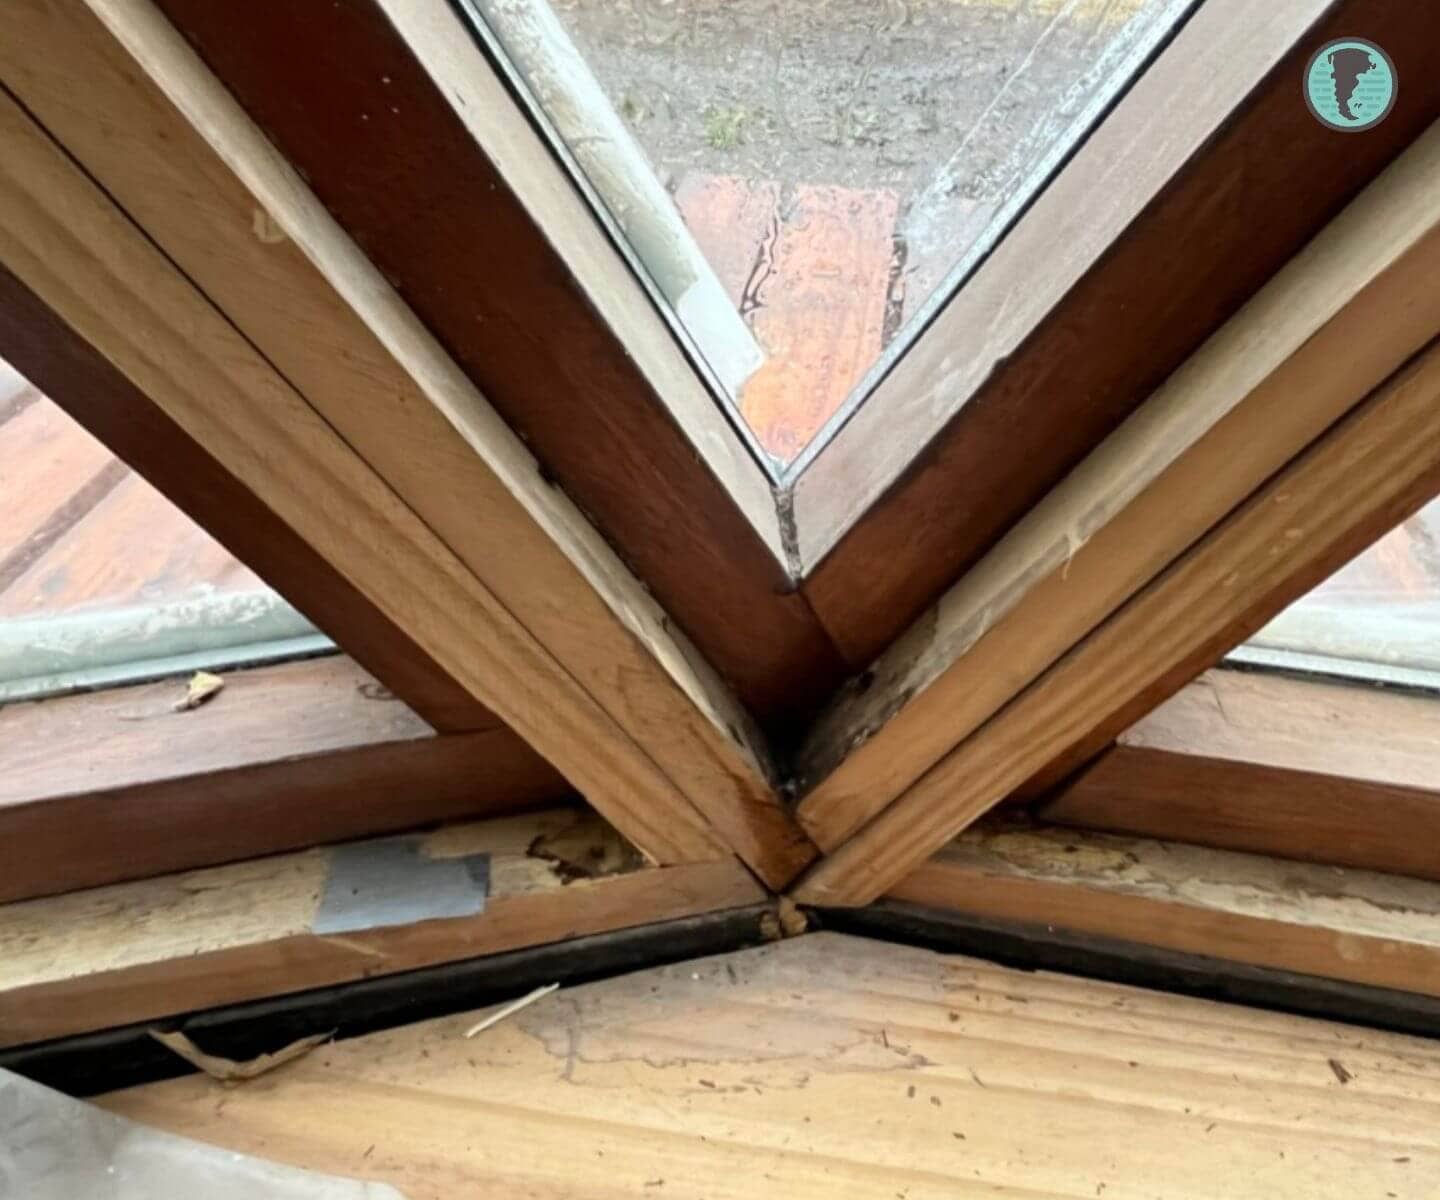
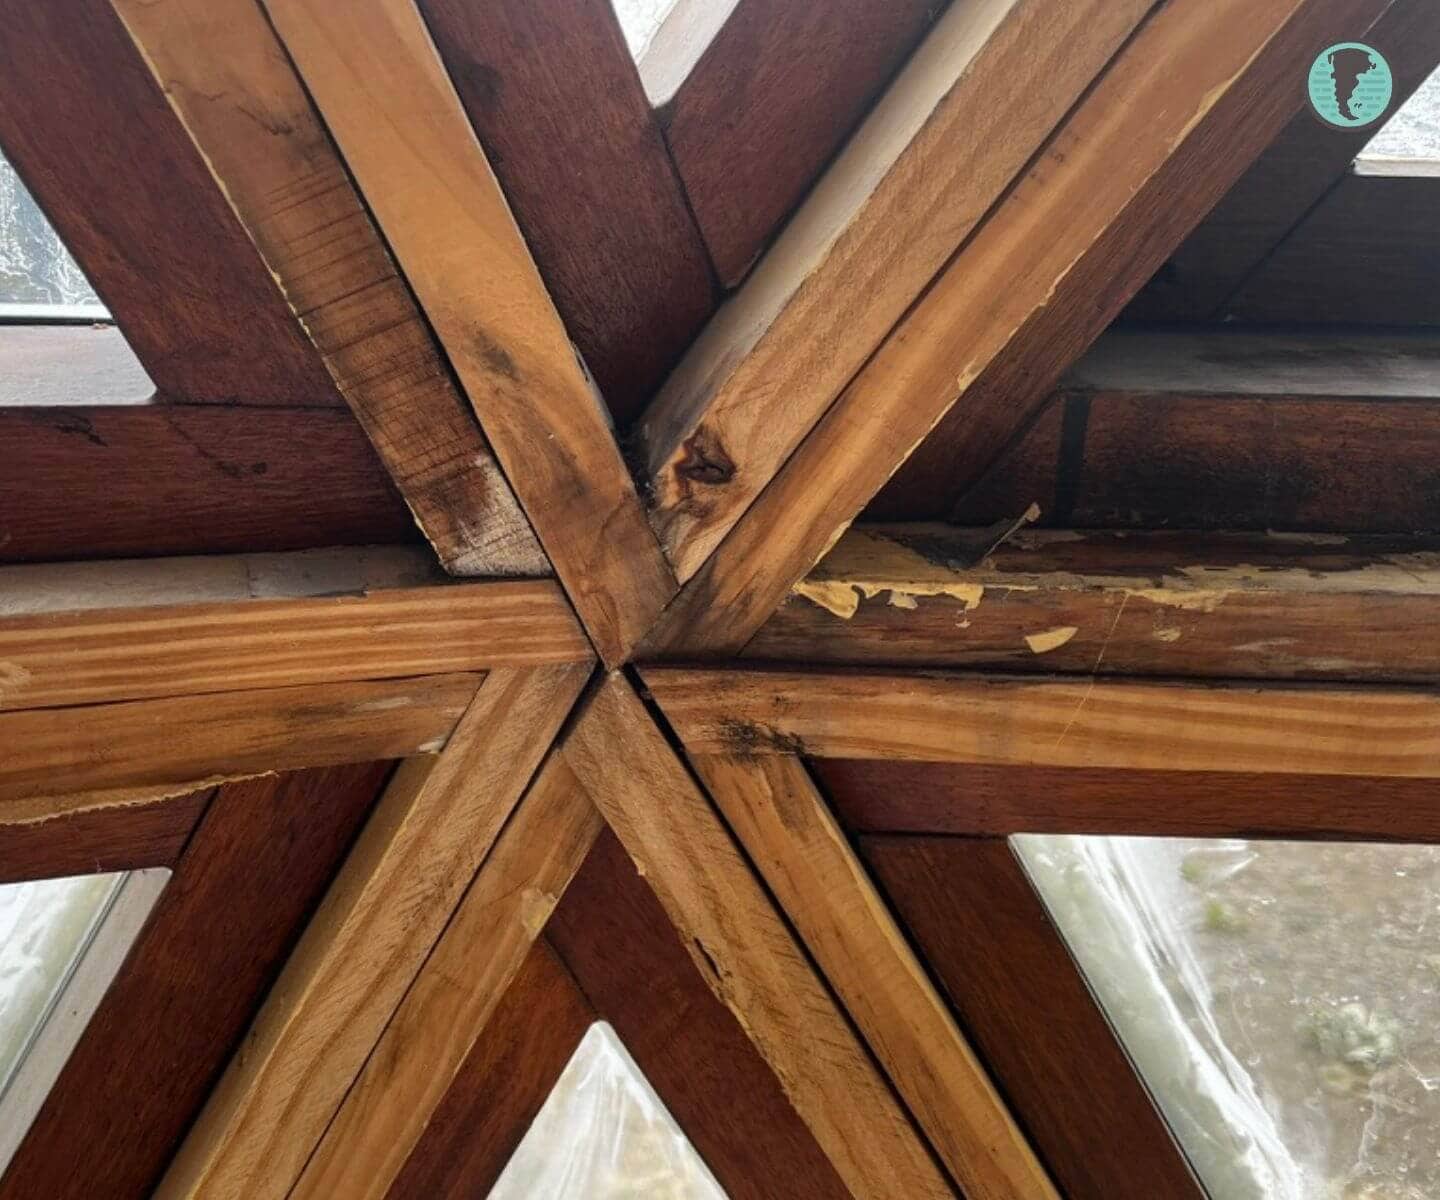
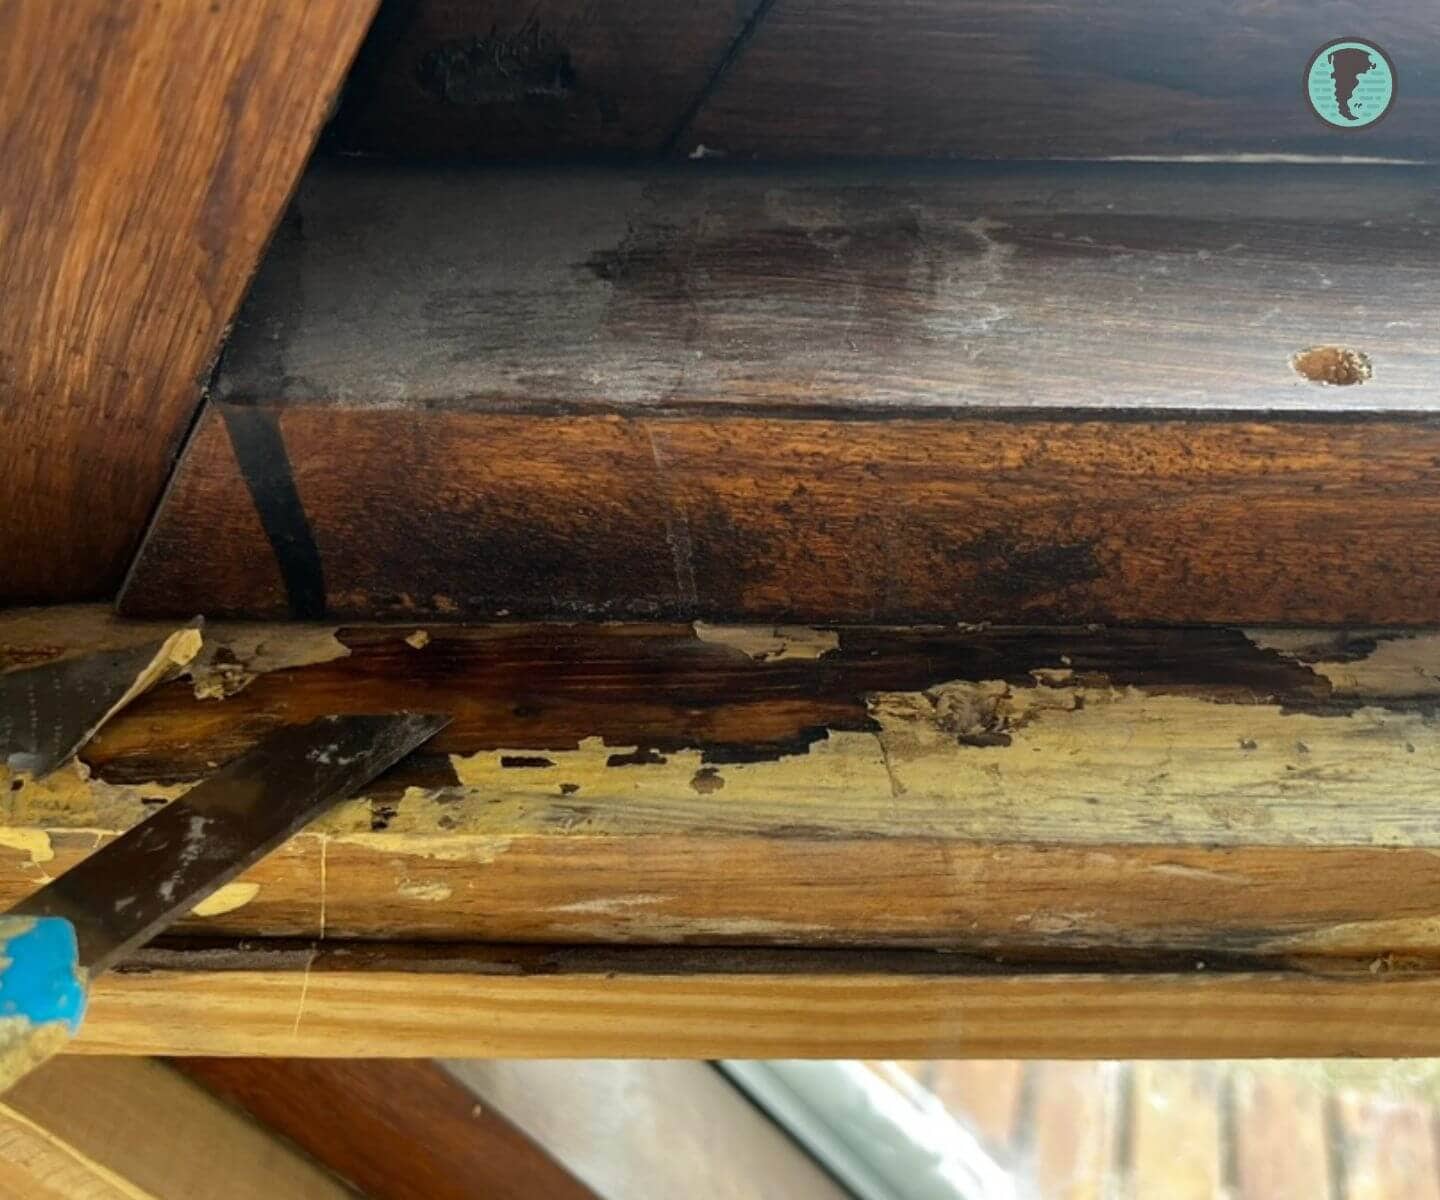
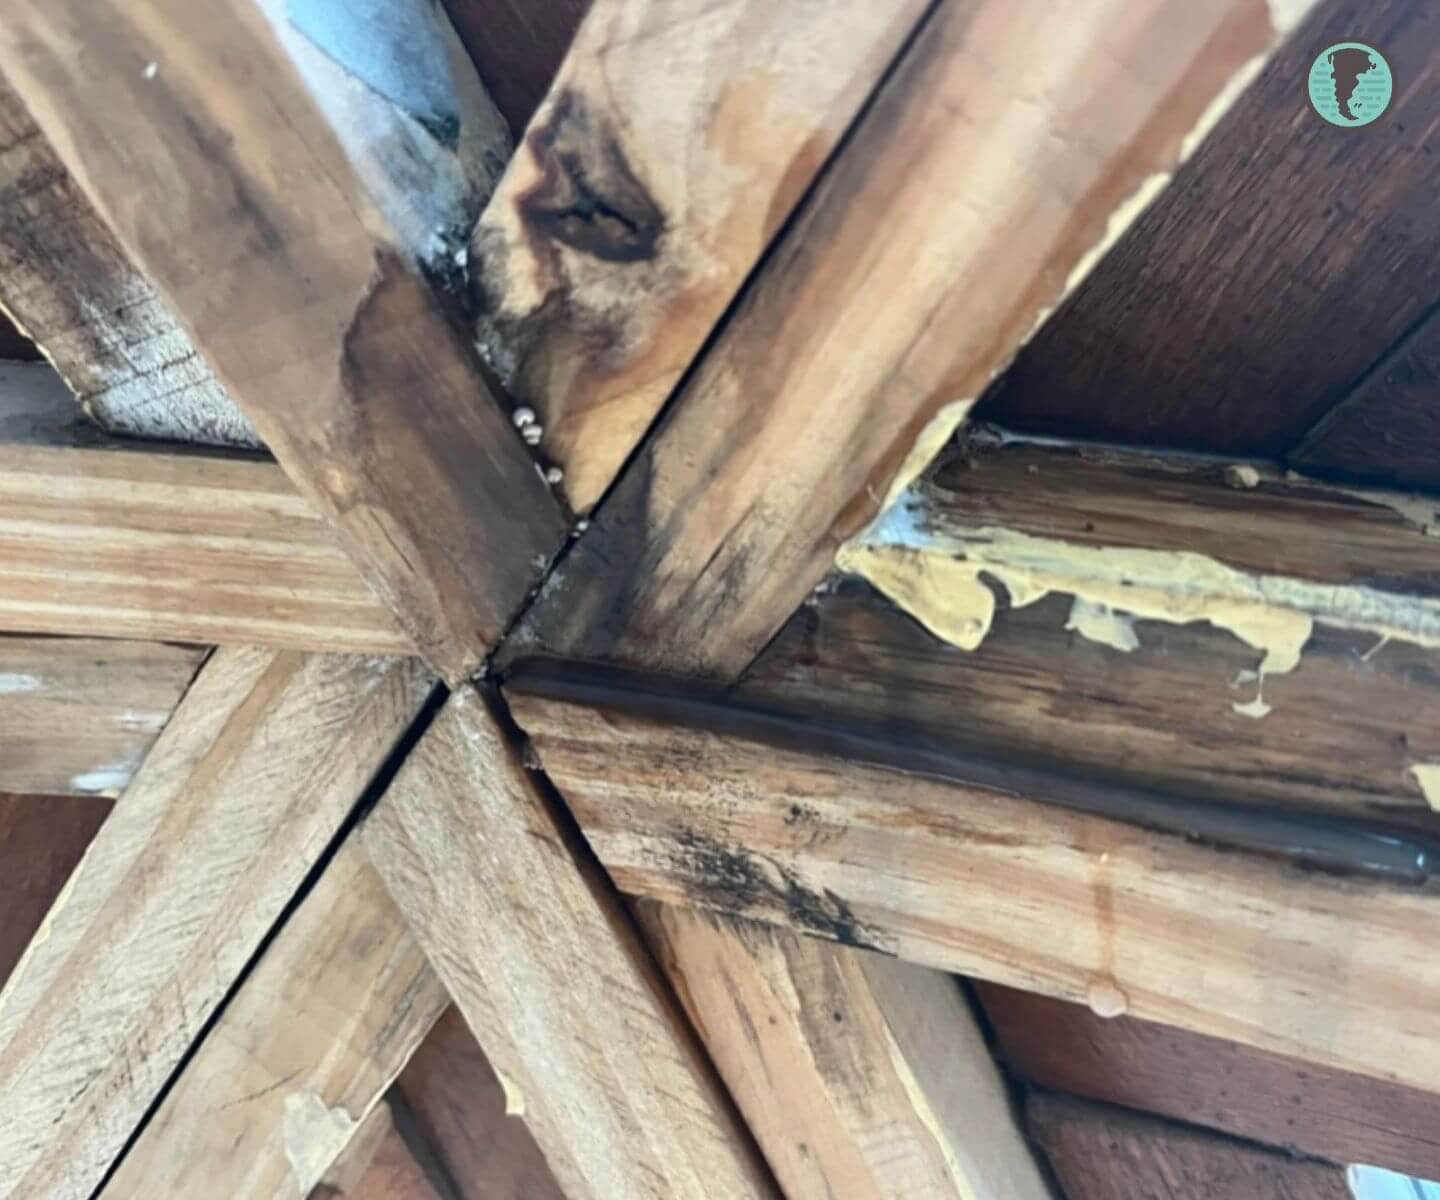
Long-Term Record
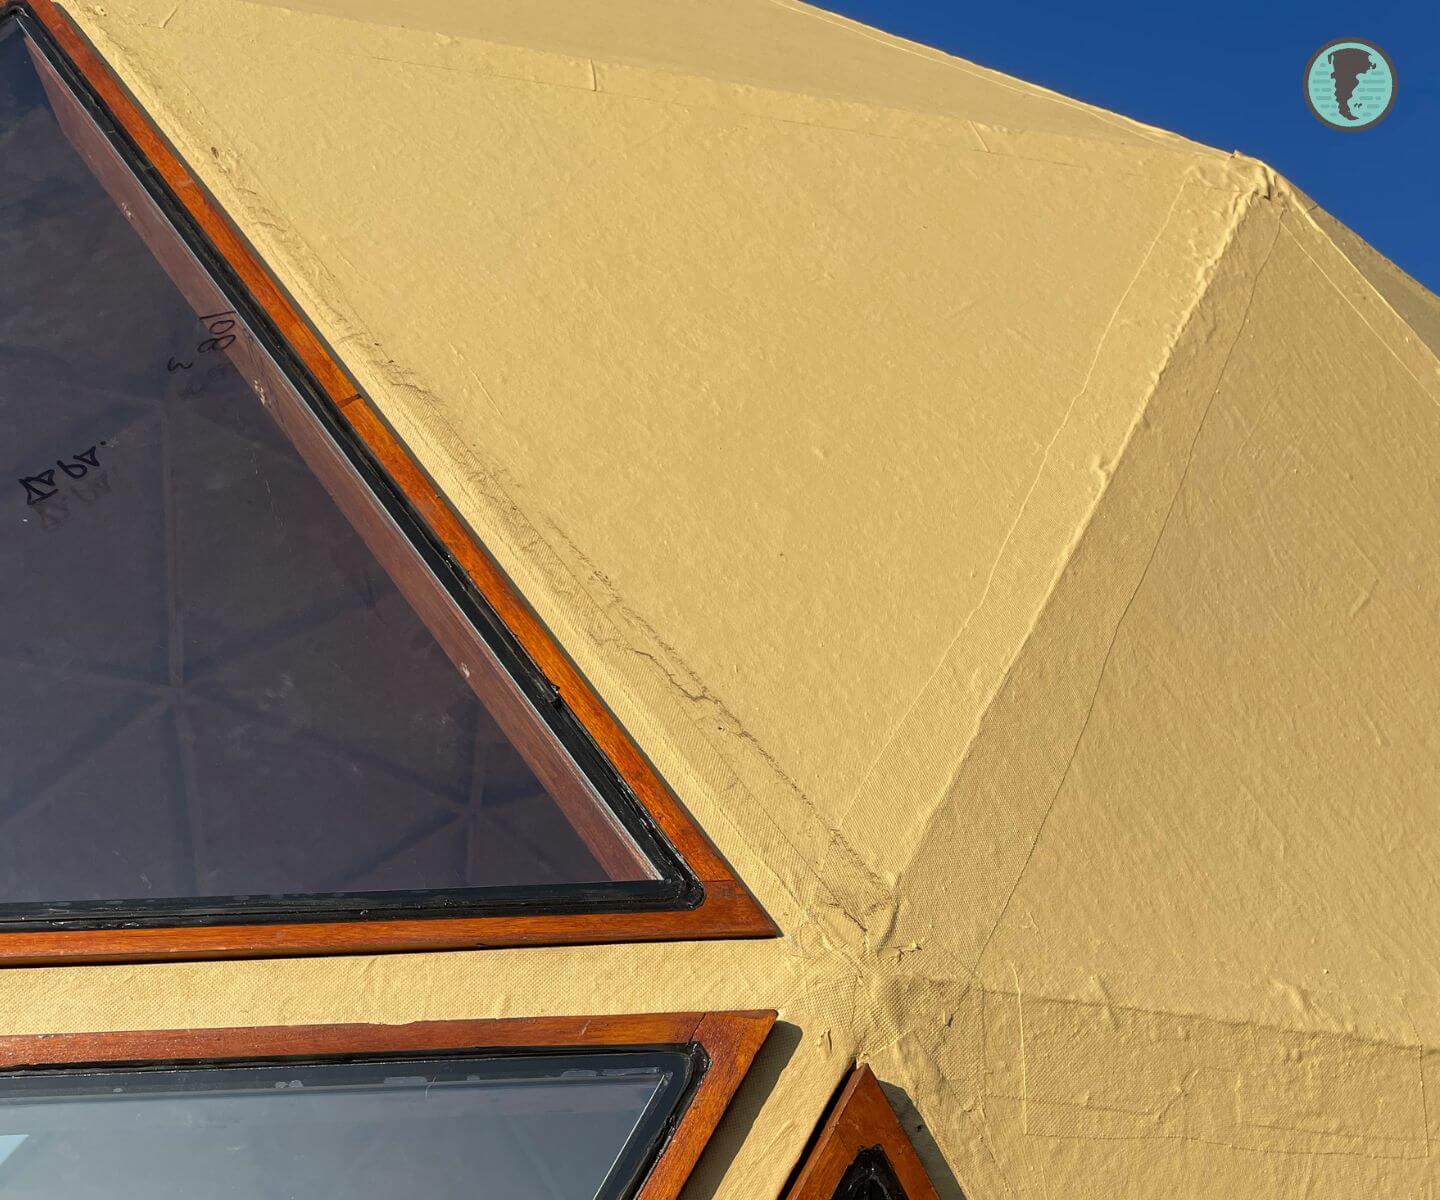
The following images show the dome structure’s condition two years later. In areas where openings and Good Karma system finishes were addressed, fungus and wood deterioration began to appear. One mistake was not adequately protecting the structure in areas where panels and windows were installed. Water ingress didn’t occur only between glass and frame, but also at the joint between frame and dome structure.


This happened despite multiple solution attempts: large amounts of sealant, layers of polyurethane paint, fiberglass tape, and successive coats of waterproofing. The experience showed that, in these geometries, layered sealing doesn’t always compensate for a water-vulnerable design.
Final Conclusion and Definitive Recommendations
Key Decisions by Project Type
- For small frames or fixed panels: The handmade method with quality eucalyptus wood and laminated glass can work well, provided exact geometry is respected and glazing is done in the workshop.
- For large window walls or highly exposed openings: Seriously evaluate industrial solutions or switch to conventional high-performance rectangular openings. Initial savings on a handmade solution can become higher long-term costs.
- Glass choice: Avoid IGUs in triangles. Opt for laminated tempered glass, more tolerant of stresses and differential movements.
- Material quality: Don’t skimp on wood, sealant, and hardware quality. Any movement or degradation ultimately affects the glass and seal.
Fundamental Truth Learned
Triangular openings in a geodesic dome aren’t a construction detail, but one of the system’s most critical points. They didn’t fail from lack of sealant or poor intention, but from the combination of complex geometry, differential movements, weather exposure, and solutions pushed to the limits of craftsmanship.
The experience demonstrated that, in these cases, accumulating layers doesn’t fix a vulnerable design. When water finds a path, it eventually gets in, even after multiple reinforcement attempts. Understanding this in time allows better decisions: simplify, standardize, or completely change approach before the problem becomes structural.
Final conclusion: If your dome has small openings and you’re willing to perform careful maintenance, the handmade solution can be viable. But for main openings or in severe climates, strongly consider standardized alternatives. Sometimes, the most elegant solution isn’t defeating the geometry, but working with it more intelligently.
Frequently Asked Questions
1. What is the main challenge when installing windows in a geodesic dome?
The primary challenge isn’t that the triangular sections are geometrically different, but rather fabricating window frames that correctly adapt to the specific angles and dimensions of each individual opening. Each opening presents unique angles, joints, and support requirements that must be solved on a case-by-case basis rather than using standardized templates.
2. How should I approach measuring and designing windows for a Patagonia geodesic dome?
Start with precise measurements taken directly from your specific dome structure, then transfer these measurements into digital drawings using tools like Adobe Illustrator to visualize joints, extensions, and tolerances. Always verify your actual measurements against your dome’s original geometric calculations before cutting any materials.
3. What materials are recommended for geodesic dome windows in Patagonia’s climate?
The article emphasizes the importance of selecting appropriate wood, glass, and sealants suited to your specific dome design and climate conditions. Professional-grade materials and proper installation techniques are critical for ensuring durability in Patagonia’s challenging weather.
4. Is hand calculation alone sufficient for geodesic dome window installation?
No—while digital tools like Adobe Illustrator are invaluable for visualization and planning, they should complement rather than replace direct measurement from your actual structure. The most successful approach combines hand calculation with digital design and real-world verification on-site.
5. What lessons about window installation failures should I know before building?
The article shares costly mistakes and failures encountered during a real Patagonia geodesic dome project, including a main window wall failure and replacement. Learning from these documented errors can help you avoid expensive problems and make better decisions for your own installation.
6. Should I hire professionals for window frame fabrication and glazing?
Yes, the article emphasizes the importance of professional glazing and proper window hardware installation, including hinges and support systems designed for the unique demands of geodesic dome geometry. Professional expertise helps ensure proper sash construction and long-term performance in challenging environments.