
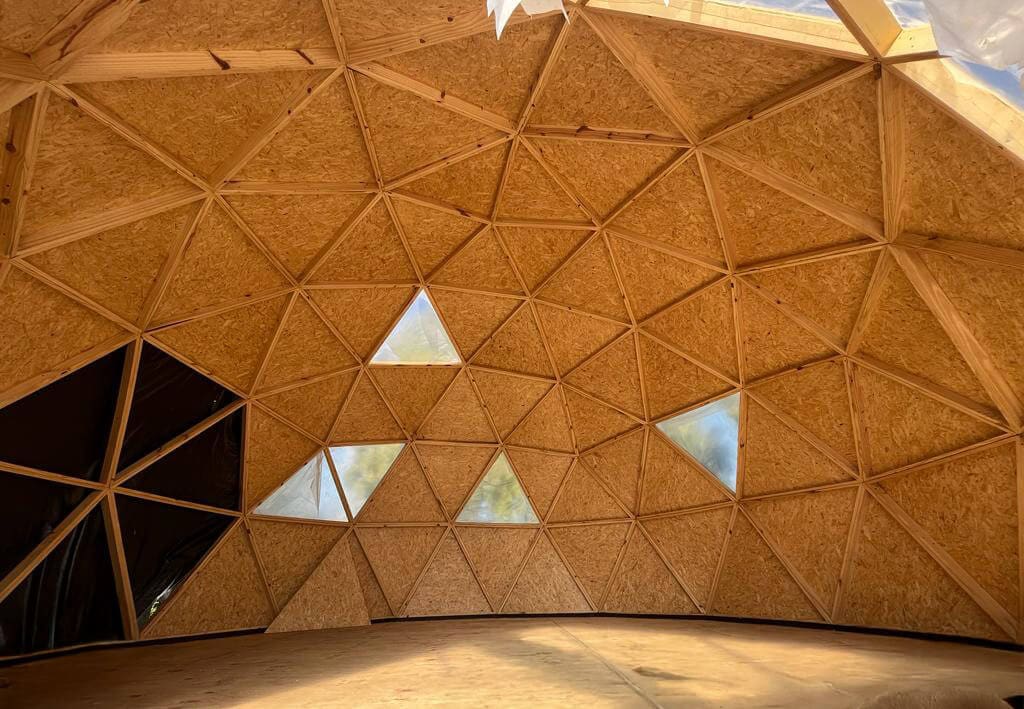
The installation of OSB panels in a geodesic dome is one of the most important stages in its construction. This step defines the structural rigidity, insulation, and the base for applying the interfacing fabric (Friselina) and polyurethane membrane that ensure exterior protection. This article offers a complete technical guide with materials, step-by-step procedures, and real construction references, based on practical self-building experiences in Patagonia.
Materials and reference costs
This stage used materials designed for outdoor applications, prioritizing durability and moisture resistance. The process applies to a 6-meter-diameter geodesic dome built on a wooden structure. The following prices are historical references (2022), useful for estimating quantities and planning the project. If you want to learn how the dome’s dimensions and frequency were calculated, check out the article about the structure and dimensions of a geodesic dome.
| Material | Use | Quantity / Unit | Approx. Cost (USD) |
|---|---|---|---|
| 9.5 mm exterior OSB | Structural sheathing for the dome | 29 sheets | 295.65 |
| White Friselina 80 g | One layer applied over each dome triangle and overlapping at joints | 1 roll x 100 m | 54.39 |
| Venier polyurethane membrane (4 x 20 kg) | Final waterproof coating | 80 kg total | 240.70 |
| 18 mm plywood | Dome floor | 11 units | 191.78 |
| 1½” and 2″ screws | Fastening OSB to the structure | ≈1700 units | 58.00 |
| Superboard putty | Sealing the joints | 15 kg | 55.00 |
| Rollers, trays, brushes, sandpaper | Application and finishing | Various | 15.00 |
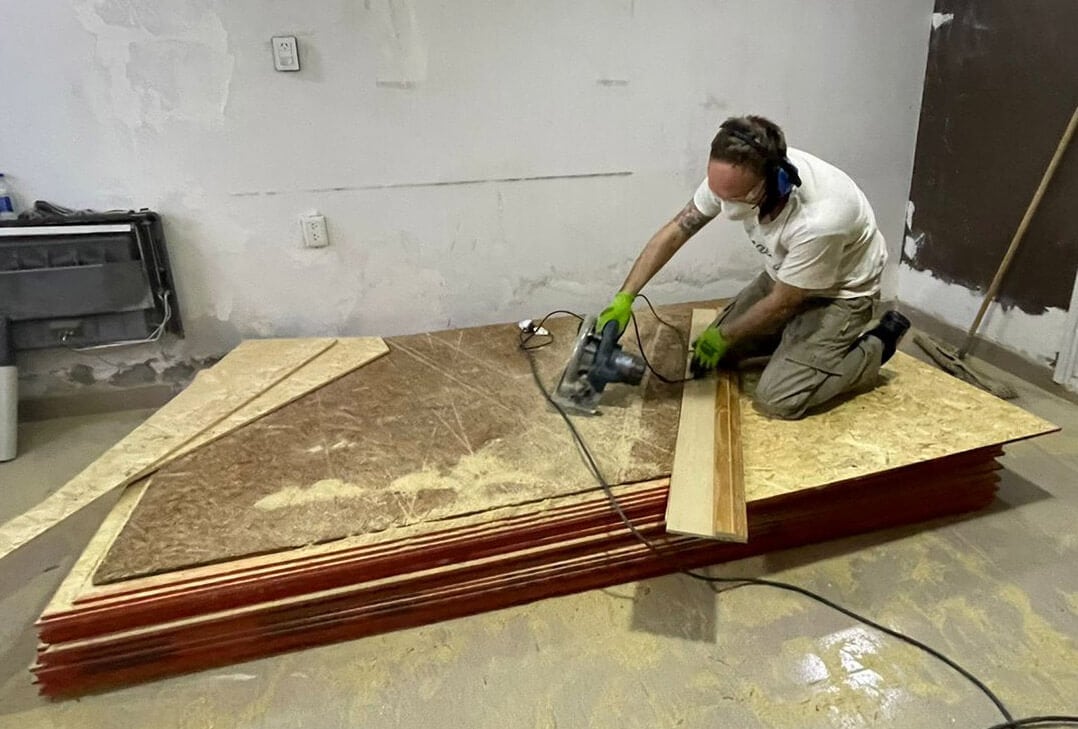
Cutting the OSB panels
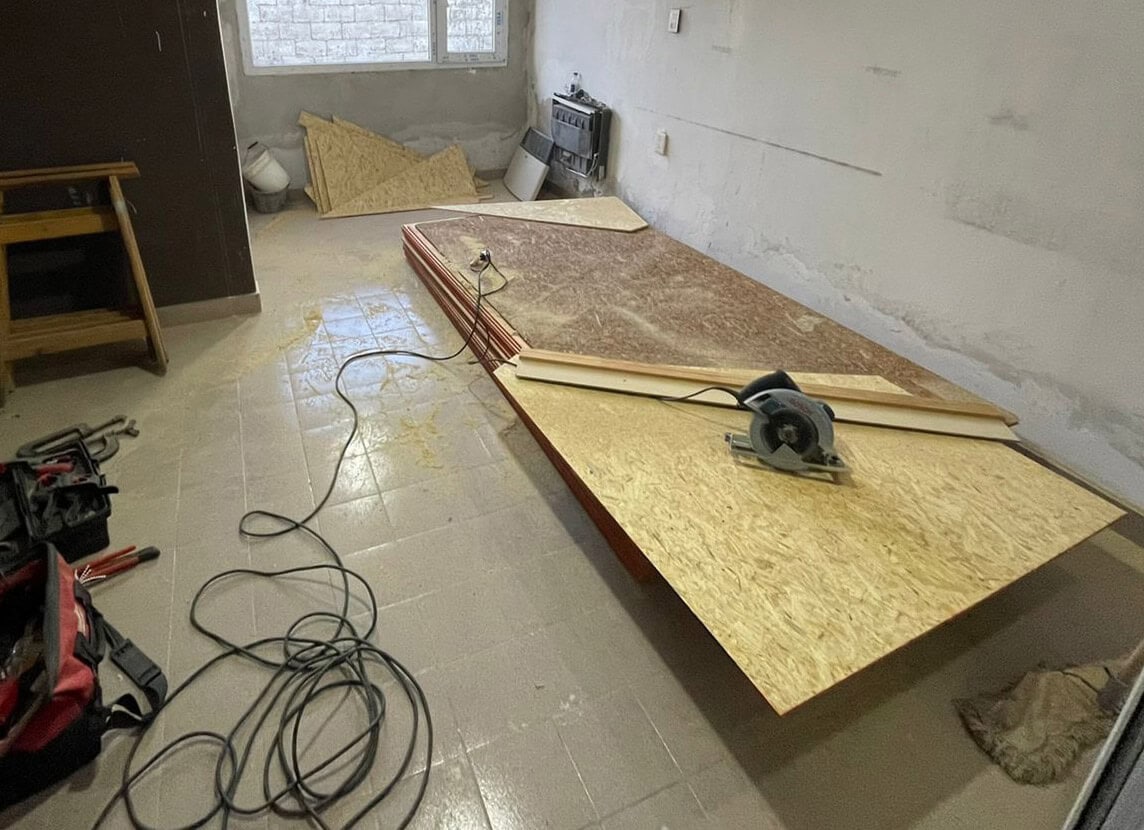
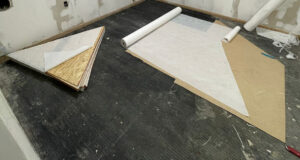
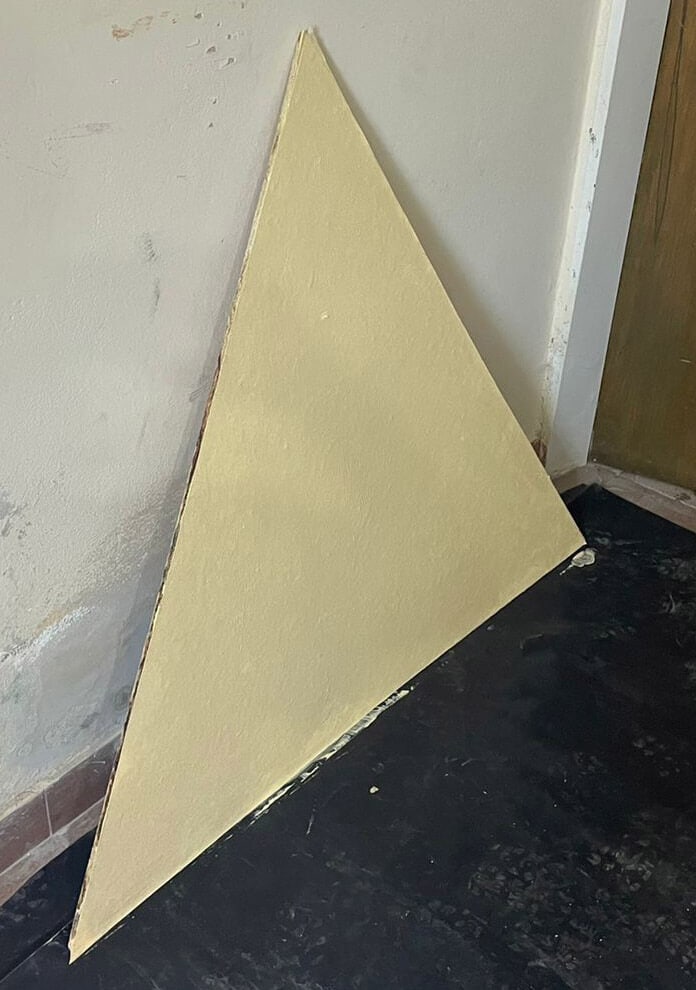
The installation of OSB panels in a geodesic dome was done by cutting three triangles per sheet, following the exact measurements of each face and labeling them with their position codes. This system allows quick identification during assembly and ensures accurate fitting between triangles.
The work was carried out in an indoor space with electricity and cutting tools, which made it possible to maintain precision and workflow continuity regardless of the weather.
Technical note: Each OSB triangle was cut using a wooden frame that replicated the dome’s actual dimensions. This ensured perfect alignment of edges during assembly. A specific frame was made for each letter code of the dome, used for precise cutting and dimensional control of the OSB.
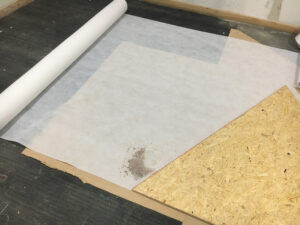
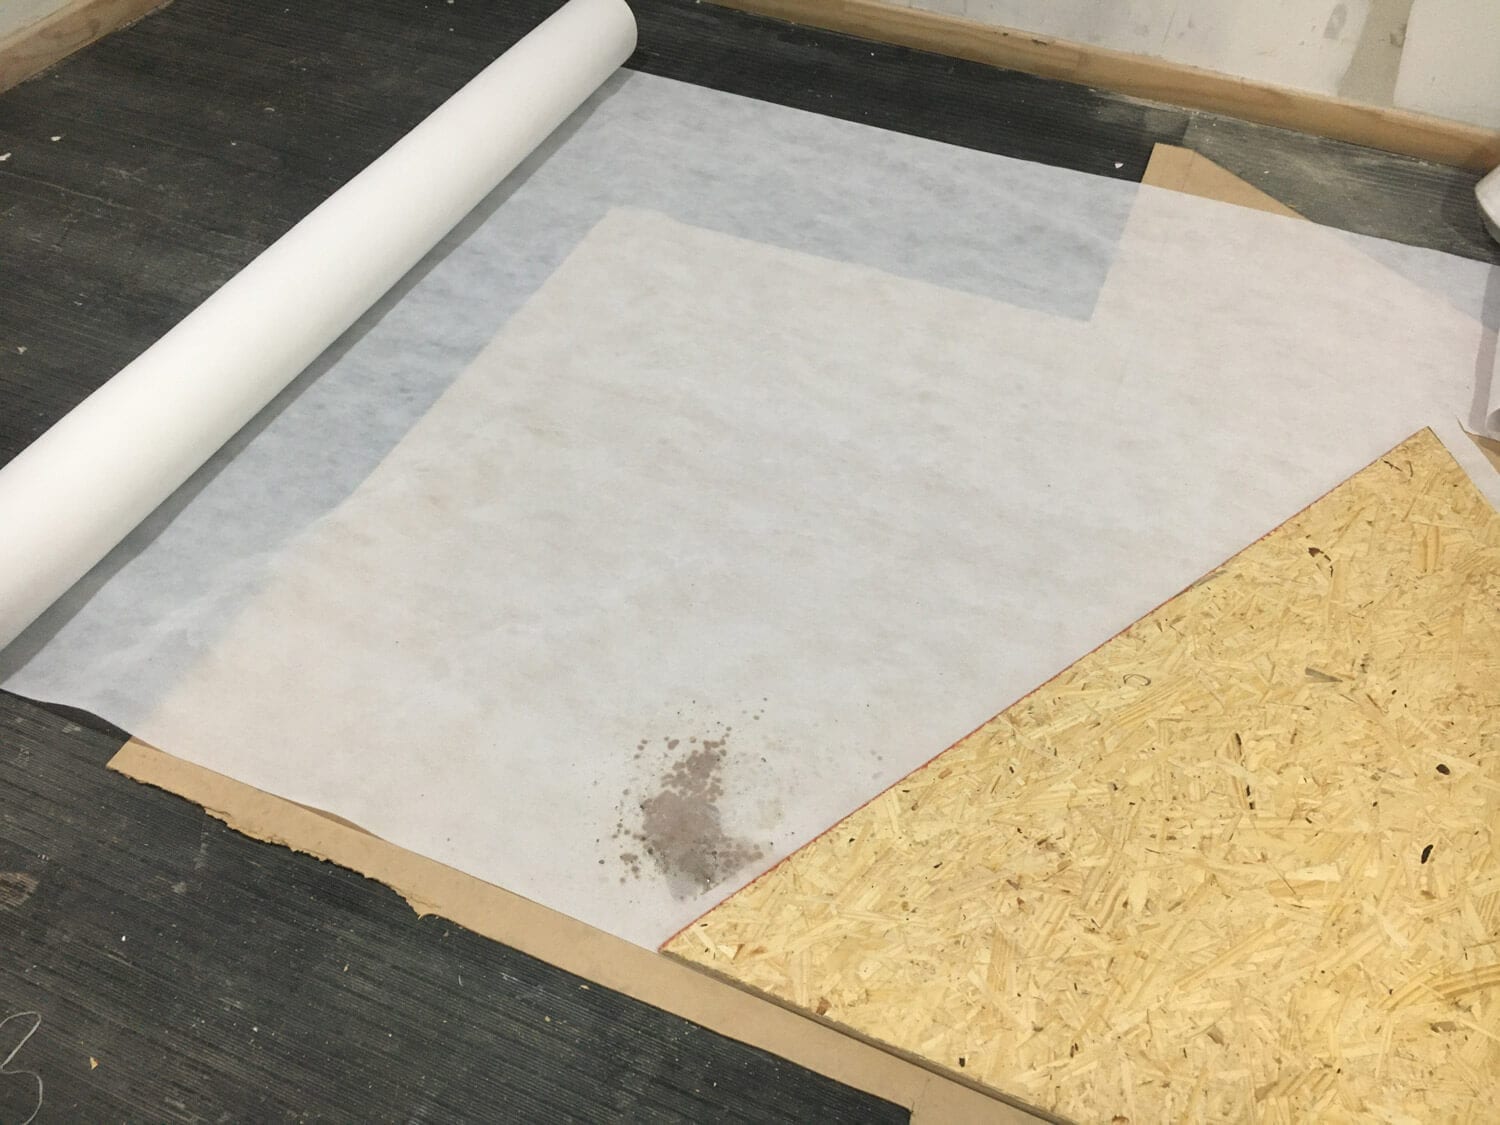
Friselina treatment
The waterproofing process began before the final assembly, with the individual preparation of each OSB triangle. For every pre-cut sheet —labeled according to its position on the dome— the Friselina fabric was cut to the exact size of the triangle, almost edge-to-edge, to avoid excess material and wrinkles during application.
Step-by-step procedure
- Apply a base coat of paint on the OSB for initial adhesion.
- Immediately place the Friselina and roll firmly to eliminate air bubbles.
- Once dry, apply a second coat of polyurethane membrane.
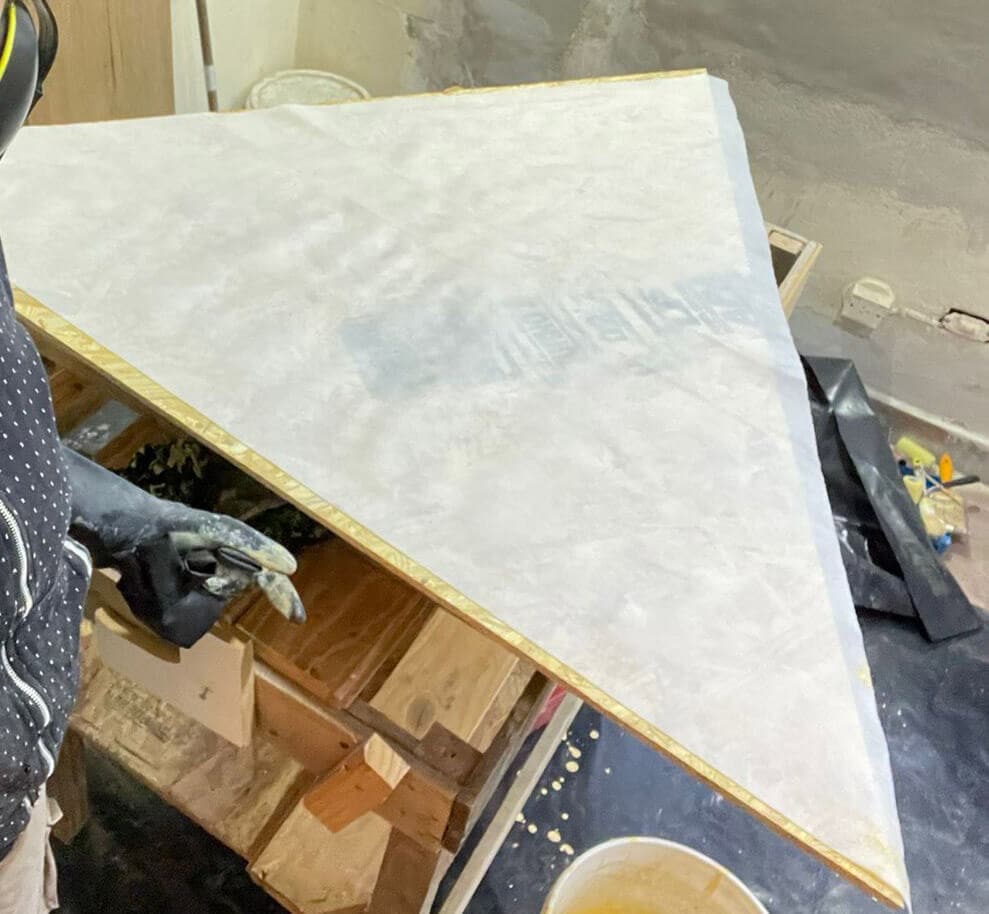
This way, each triangle was waterproofed before installation. Once on-site, the panels were screwed in place, and the joints between triangles were sealed with Superboard putty, followed by a new coat of paint and a Friselina strip across the entire joint width, applied generously to ensure total continuity.
Important: This pre-treatment method improves protection against leaks and speeds up final waterproofing since the OSB is never exposed without coating.
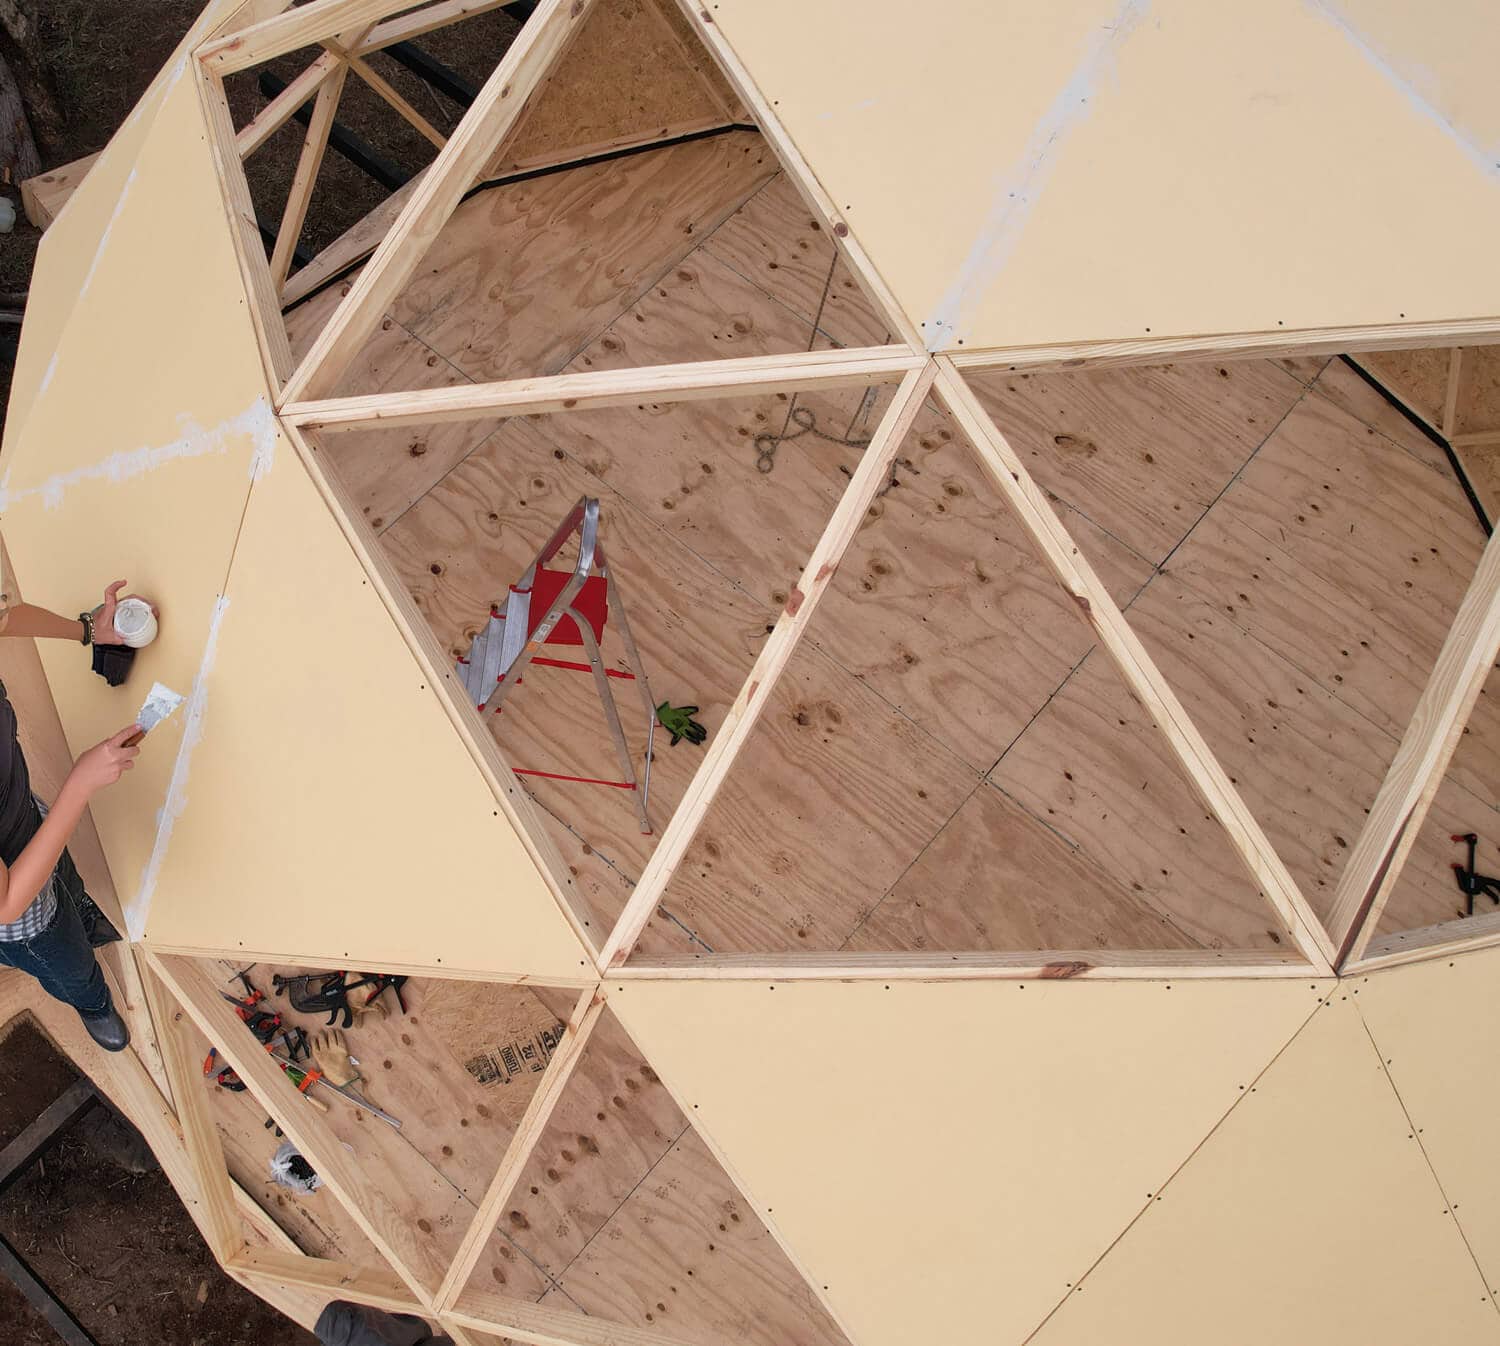
Installation and sealing of OSB triangles on the dome
Once the pre-treatment was complete, the cut and waterproofed OSB triangles were transported to the construction site. They were placed one by one on the dome’s wooden structure and fastened with screws until the surface was fully covered. Immediately afterward, Superboard putty was applied to each joint, sealing the edges and allowing it to dry for 24 hours.
The next day —always working in dry weather— the joints were checked, sanded, and cleaned with damp cloths to achieve smooth and precise connections before applying the final waterproof layer.

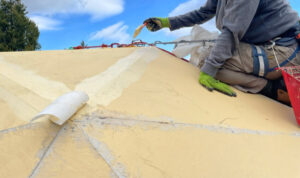
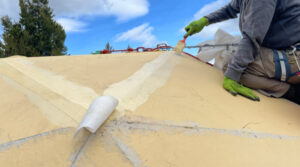
Wide Friselina strips were cut to cover each seam, avoiding folds and ensuring that overlaps would not accumulate water. The procedure was repeated on all joints:
- 1. Base application: Generously apply paint along the joint.
- 2. Place the Friselina: Immediately press the strip with gloves until it adheres without bubbles.
- 3. Final sealing: Apply another abundant coat of paint over the fabric for complete coverage.
After drying, a final coat of polyurethane membrane was applied over the entire dome. This coating reinforced the seams and protected the whole surface from UV rays, moisture, and structural movement. The final result was a continuous, flexible, and durable shell —ready for exterior paint or sealant, depending on the dome’s intended use.

Process timeline
- Day 1–2: Cutting and labeling OSB panels.
- Day 3–5: Applying Friselina and first coats of polyurethane membrane.
- Day 6–7: Installation of panels and initial sealing with Superboard putty.
- Day 8–10: Application of Friselina strips over joints.
- Day 11–12: Final polyurethane coating and visual inspection.
Conclusion
The exterior sheathing system combining OSB, Friselina, and polyurethane membrane results in a watertight and weather-resistant geodesic dome. This mix of materials offers an ideal balance between cost, technical performance, and sustainability, providing a durable shell suitable for harsh Patagonian conditions.
Frequently Asked Questions
Why is OSB chosen for dome cladding?
Because it offers structural rigidity, good mechanical strength, and ease of cutting according to the dome’s geometry. It is also more affordable and eco-friendly than phenolic or marine plywood.
Is it better to waterproof OSB triangles before assembly?
Yes. Preparing and sealing each panel individually with paint and Friselina prevents leaks, shortens construction time, and protects the material from humidity.
How are the joints between triangles sealed?
Superboard putty, membrane, and Friselina strips are applied over each joint. Reinforced with several paint layers, this system ensures full continuity and waterproofing.
What type of membrane is used as the final protection?
A liquid polyurethane membrane, applied in two or three coats over the dome after sealing the joints. It provides flexibility and UV resistance.
How often should maintenance be done?
Depending on the climate, once a year in Patagonia. It can be renewed with an additional coat of membrane or elastic exterior paint.